Documentation Index
Fetch the complete documentation index at: https://mulerun.com/docs/llms.txt
Use this file to discover all available pages before exploring further.
MuleRun-Ready n8n Examples
If you want to find some MuleRun-ready n8n workflows, check MuleRun n8n ExamplesSupported n8n Versions
MuleRun currently supports the following n8n versions: 2.1.4, 1.119.2, 1.109.1, and 1.103.0. We recommend creators use the latest supported version within this range to build agents and workflows.Currently Supported Node List
Input Nodes
- n8n Form Trigger and Chat Trigger are supported. The n8n Form supports element type such as Dropdown, Checkboxes, Date, Text, File, etc. Chat Trigger now supports both text input and file uploads.
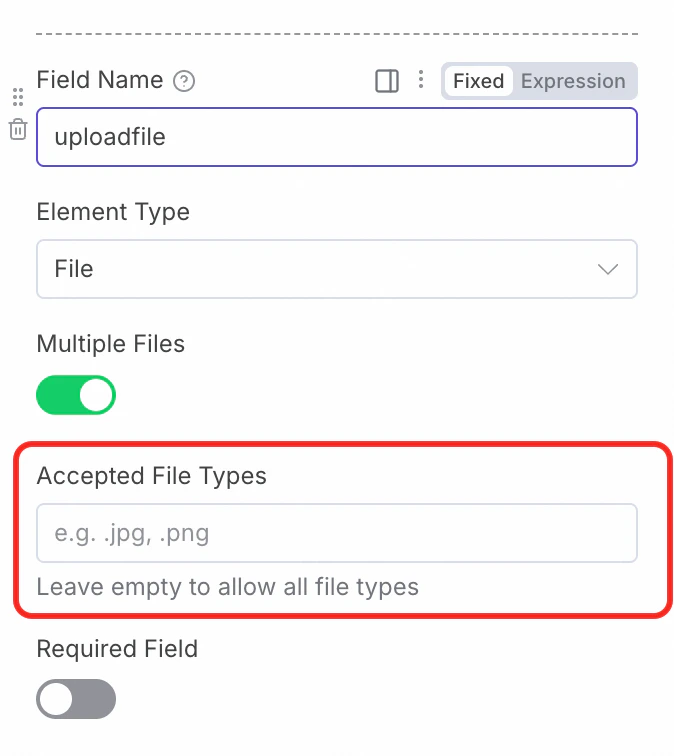
- Please enter valid
Accepted File Typeswhen chooseFileElement Type in n8n Form Trigger.
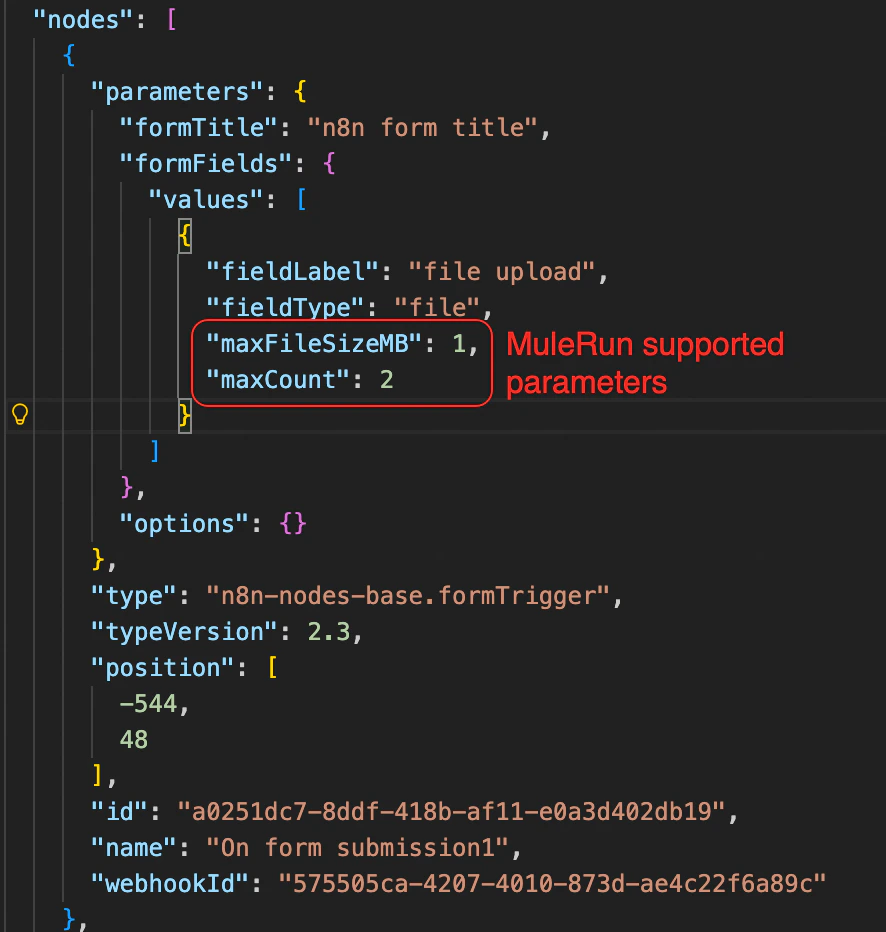
maxFileSizeMB (max ~200MB) and max_count (max ~50) to fields which fieldtype=file in n8n Form Nodes. MuleRun uses these for static, pre-execution validation of uploaded files.
- Please connect
MemoryNodes such asn8n Simple Memoryif you want your agent to maintain context across multiple turns when using Chat Trigger.

-
Other Trigger nodes, including
Manual Triggerwebhook, etc., are not supported. - The field names defined in the n8n Form will appear in the input section before the agent is executed. To ensure clarity, use meaningful and descriptive field names, or add hints to guide user input. Field names should follow either camelCase or snake_case conventions, and MUST NOT contain spaces.
Output Nodes
Creators can configure the output nodes and content freely. If a field name in any node matches the following names, it will be output in a specific format:| Field Name | Type | Usage | Example |
|---|---|---|---|
markdown_content | string | Display Markdown text | "# Title\nContent" |
html_content | string | Display full HTML page | "<!DOCTYPE html>..." |
attachment_urls | string/array/object | Attachment links (auto-extract URL) | ["https://..."] or text/object containing URL |
navigation_urls | string/array/object | Automatically opened webpages (auto-extract URL) | ["https://..."] or text/object containing URL |
binary_content | binary | File output (supports multiple) | binary data |
error_message from this node will be output on the MuleRun platform and displayed to the user.
LLM (Large Language Model) Nodes
It is recommended that Creators use the MuleRun Creator API Key to invoke Large Language Models. MuleRun currently supports:- OpenAI: Chat Completion and Response interfaces
- Anthropic: Messages interface
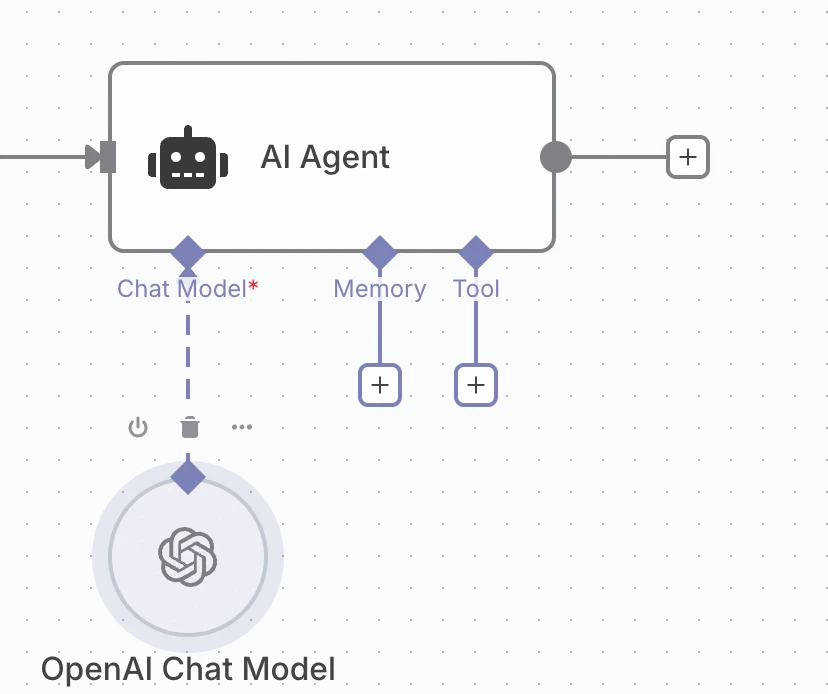
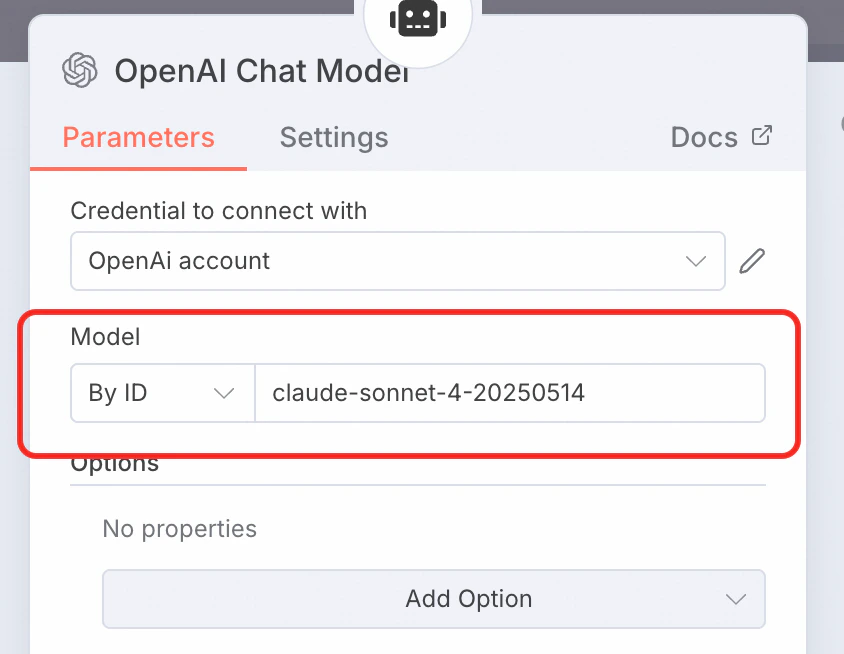
If you need to use the LLM API Key provided by the MuleRun platform (without requiring the creator to provide their own LLM API Key), it is recommended to use the AI Agent in n8n and connect it to an OpenAI Chat Model, as shown in the figure below.
Intermediate Nodes
- All nodes officially supported by n8n are supported.
- If community nodes need to be included, please communicate in advance.
- Sub-workflows are not supported.
Currently Supported Credentials
n8n Official Nodes
- All Credential nodes officially supported by n8n are supported.
OAuth Configuration
-
If the workflow requires OAuth-type Credentials, it is recommended that the Creator register as a developer with the OAuth service provider, create an application, and provide the
ClientIDandClientSecretfor that application. -
The MuleRun OAuth Redirect URL is:
https://mulerun.com/api/platform/agents/oauth2-credentials/callback
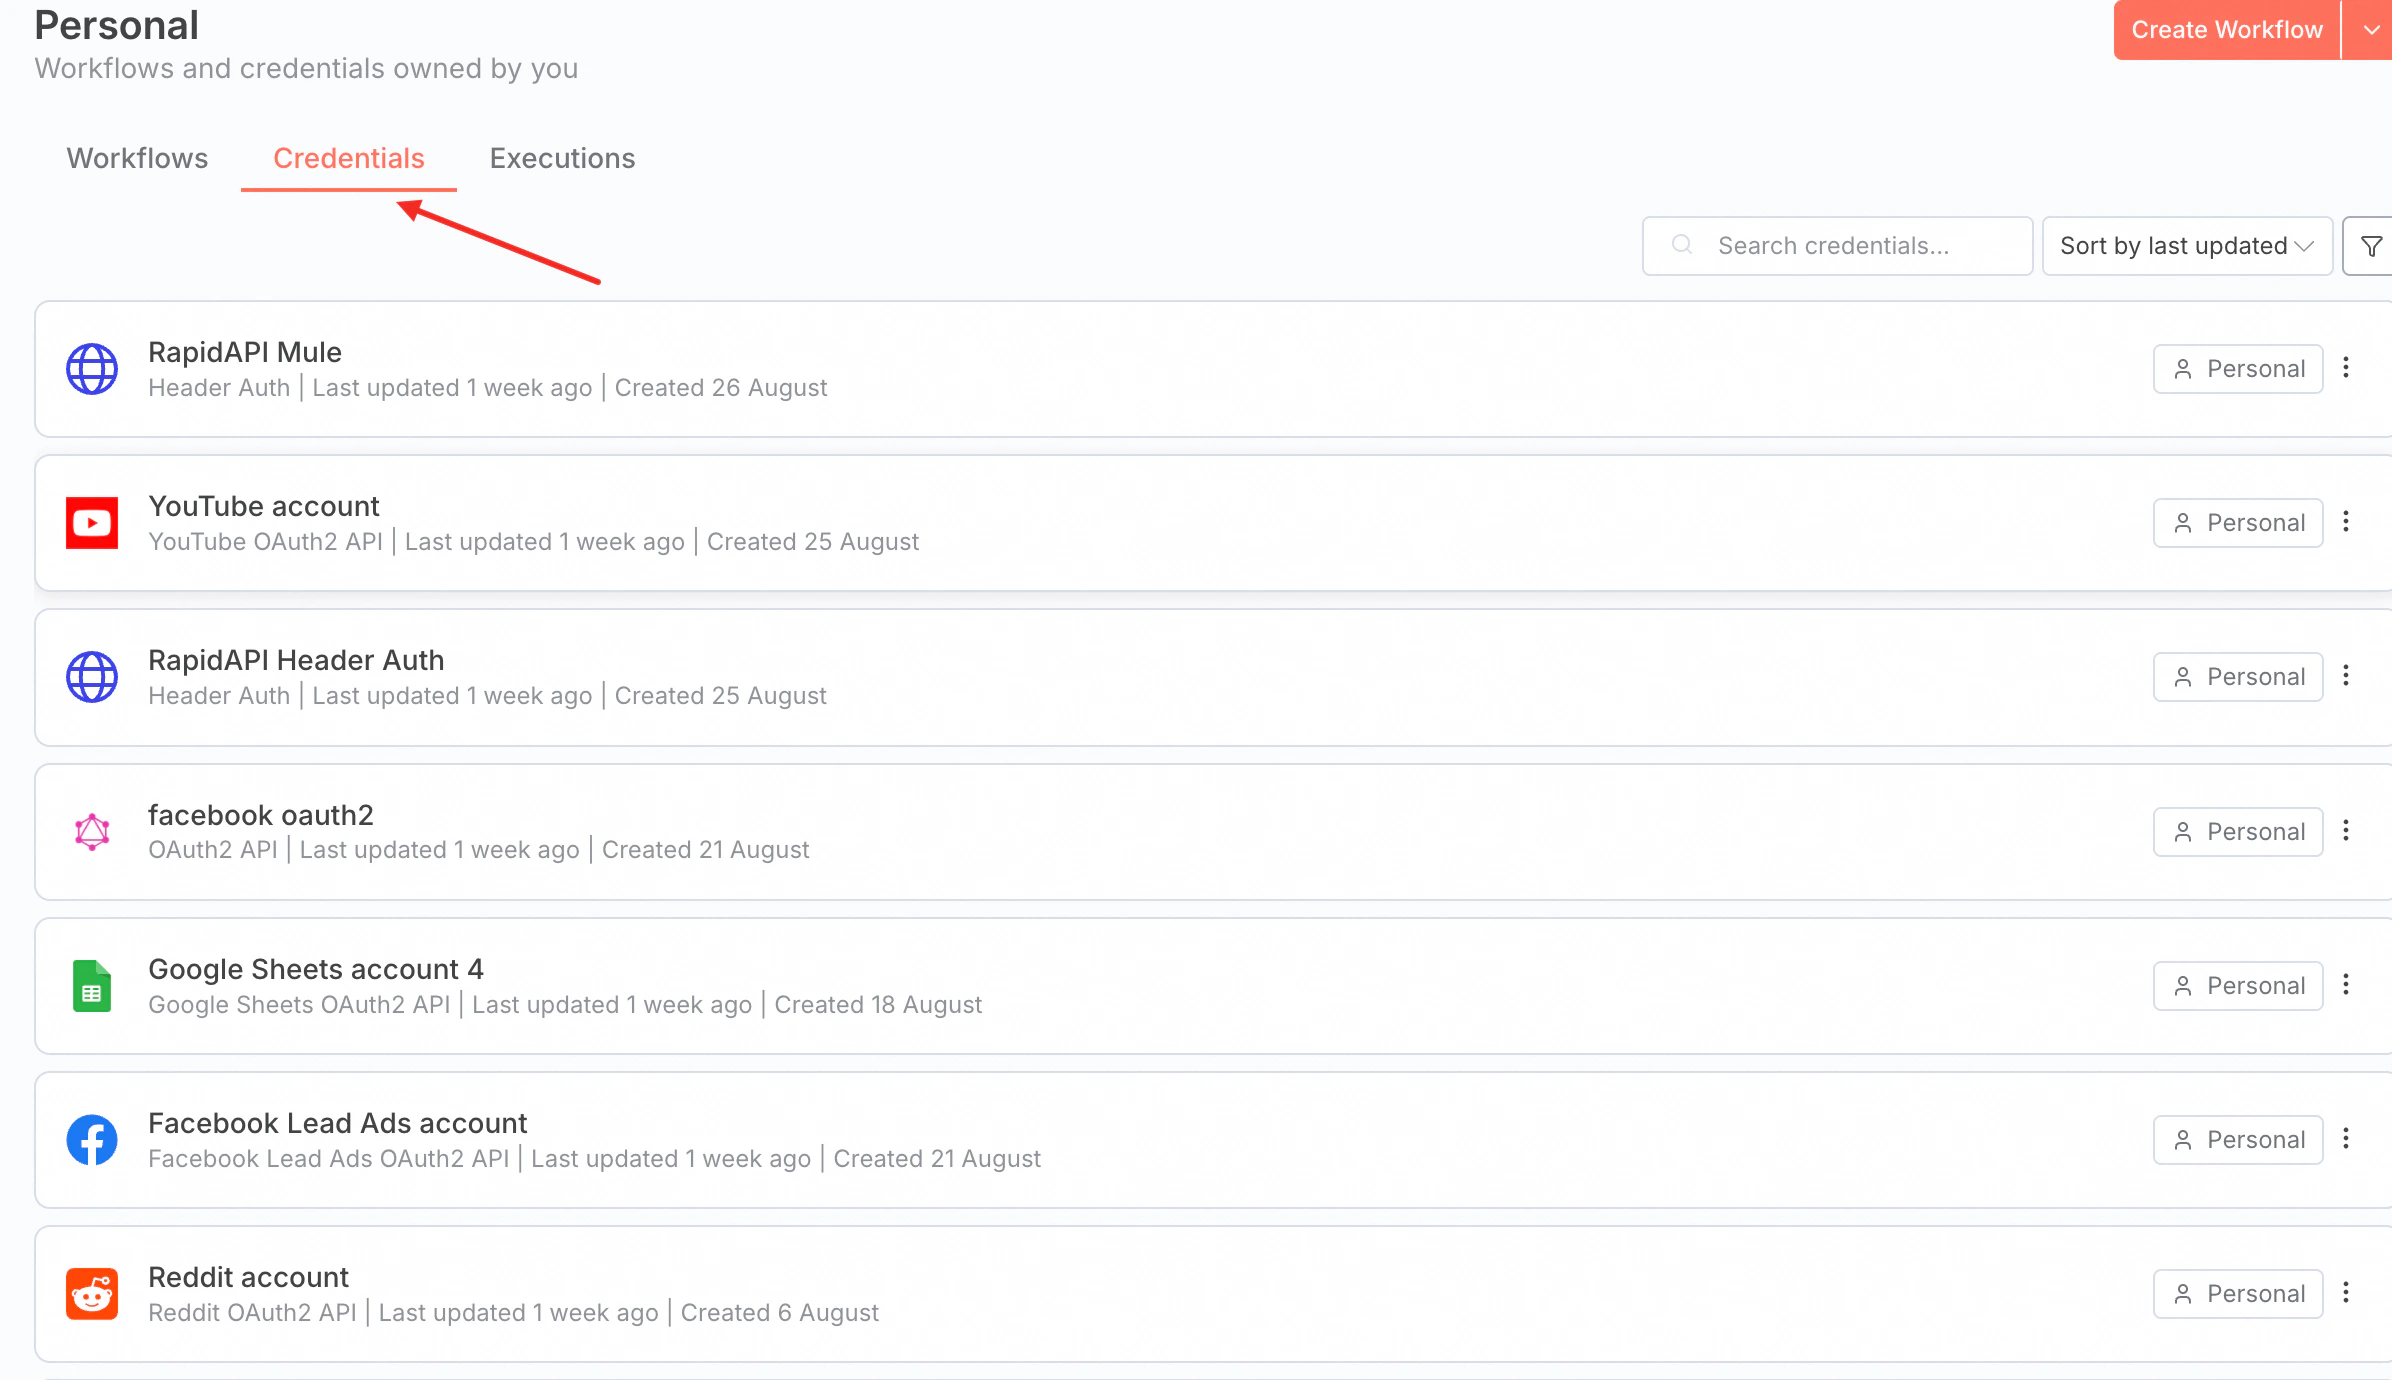
- If an API Key is used in the workflow, it must be configured using n8n’s Credential functionality. Hardcoding the Key in the workflow is not allowed. The n8n configuration is shown in the figure below:
- Even if the API provider uses a custom API Key and n8n does not have a node for that request, it can still be configured using the Credential method.
| Scenario | Using Credentials | Not Using Credentials |
|---|---|---|
| Key Expiration/Update | Modify the configuration to update the API Key without updating the workflow code | Update the workflow code, submit for review, which requires an approval cycle |
| Key Provision | Can be provided by MuleRun, Creator, or User, with multiple configuration options | Can only be provided by the Creator, who must ensure the Key’s availability |
| Key Security | Encrypted storage, no leakage | May be leaked to third parties, leading to Key consumption |
- For specific examples, see Appendix 2: Example of Non-Standard Credential Configuration.
Debugging Agent
To address the issue of creators lacking effective runtime data when debugging agents, we now supports custom parameters configuration of agent runtime output data for creators. Creators can configure settings for two different scenarios: MY CONFIG and AGENT USER.- MY CONFIG: These settings apply when the Creator runs or tests the agent. You can customize output levels and debug information to help with development and troubleshooting.
- AGENT USER: These settings apply when End Users run the agent after it is published. This allows you to control the experience and information visibility for your users.
- Node Input/Output Information Level
- Content Length Limits
- Display LLM Node Model Token Usage Information
- Display LLM Node Model Output Content
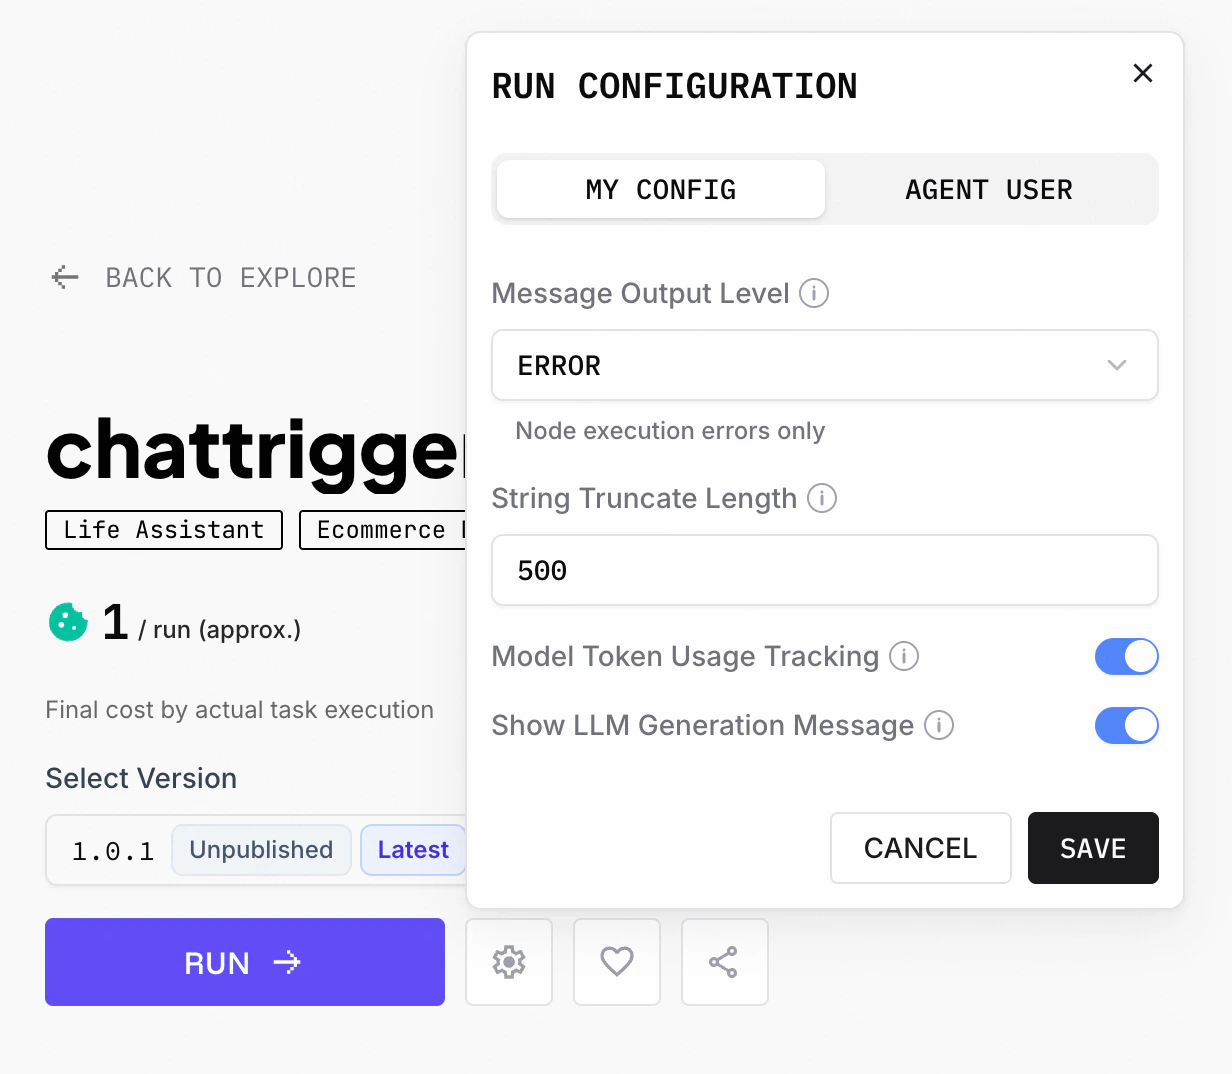
Message Output Level
Three levels of message output during the workflow execution are currently supported:| Level | Node Input/Output | Node Status | Error Message |
|---|---|---|---|
| DEBUG | ✅ | ✅ | ✅ |
| INFO | ❌ | ✅ | ✅ |
| ERROR | ❌ | ❌ | ✅ |
String Truncate Length
Maximum number of characters to show for workflow input/output data. Content longer than theString Truncate Length value will be truncated for better readability.
Model Token Usage Tracking
Shows model token consumption after LLM node executed.Show LLM Generation Message
It will show the chat messages of LLM generation after LLM node executed.Human In The Loop
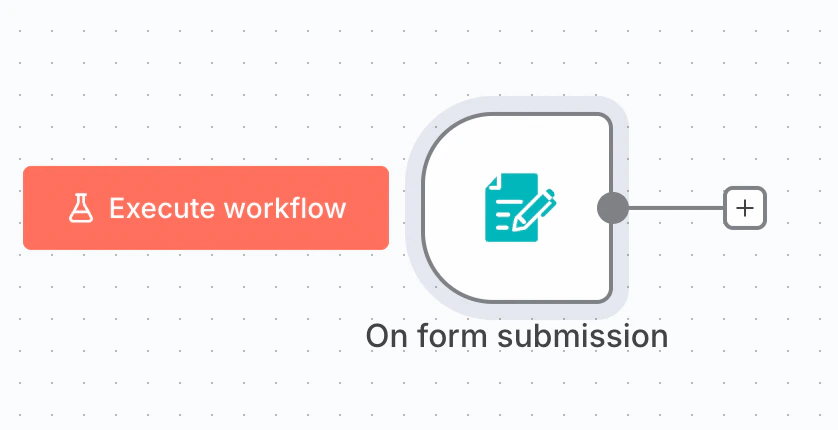
We now support workflows that allow users to provide additional input while it is running. We call it Human-In-The-Loop (HITL). Creators can build workflows that include an n8n Form node to accept user input mid-execution. Currently, the n8n Form is the only node we support for HITL functionality.
Appendix 1: Examples of n8n Workflow Node Output
1. Dialog Box Output
Markdown Text
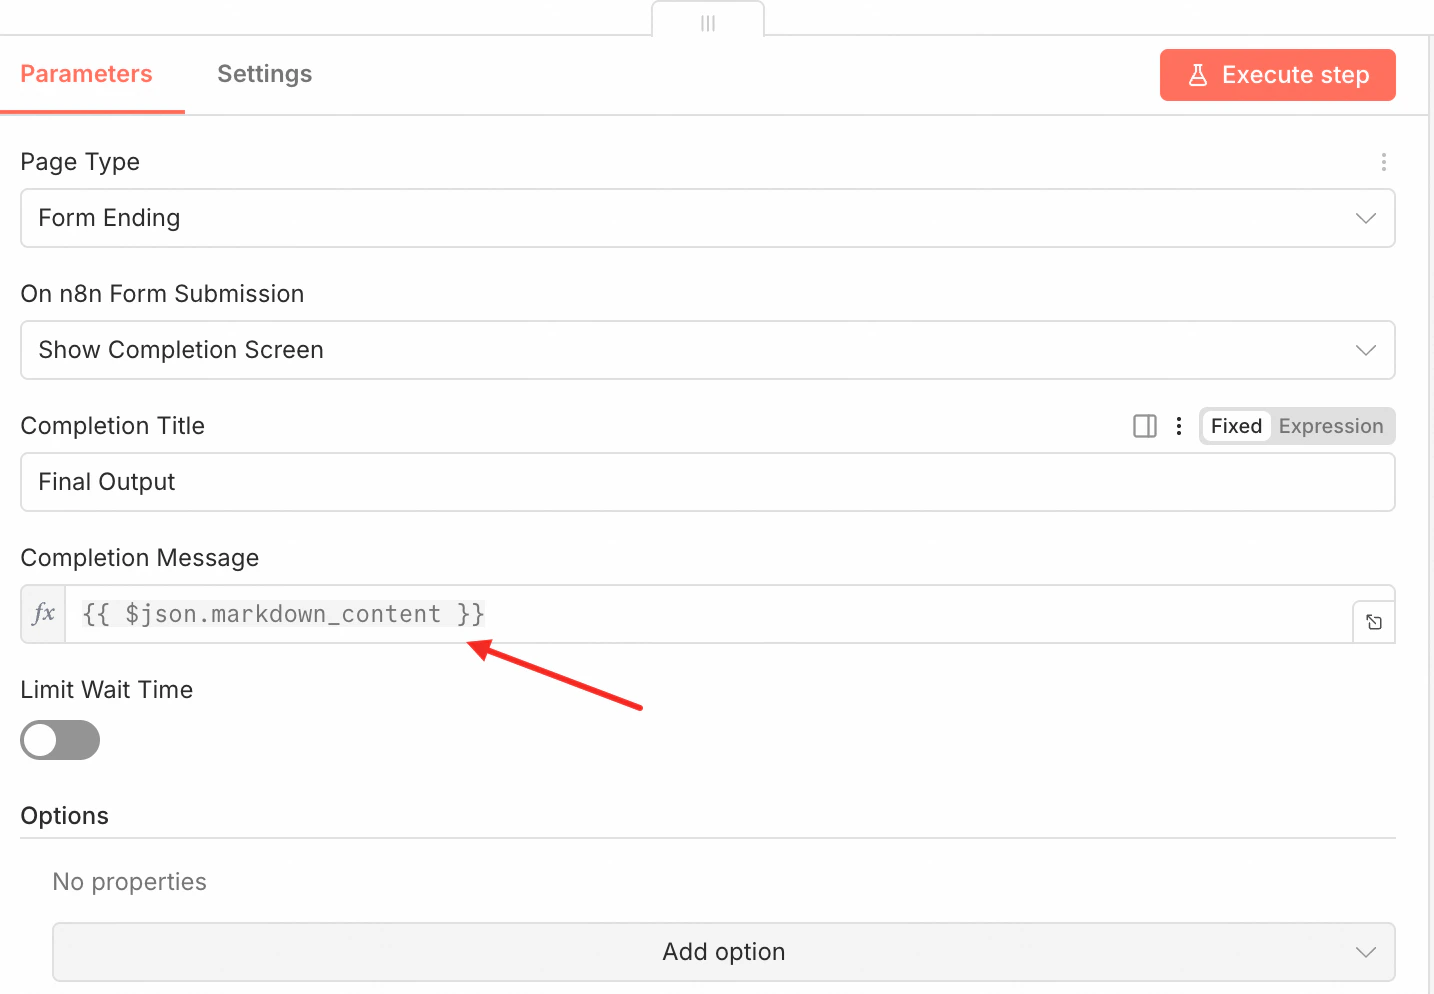
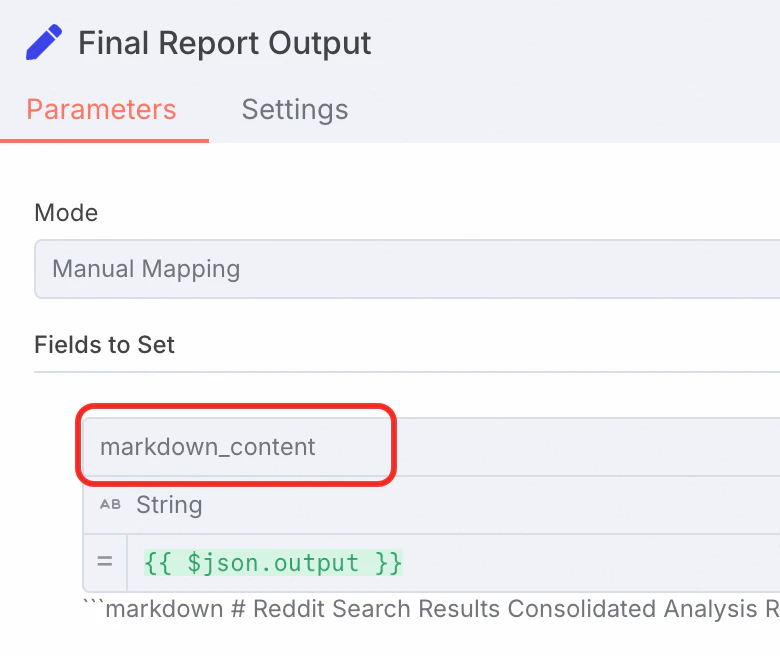
- The final node output must have a JSON key field named
markdown_content. The dialog box will render the Markdown effect. The node requirements are shown in the figure below:
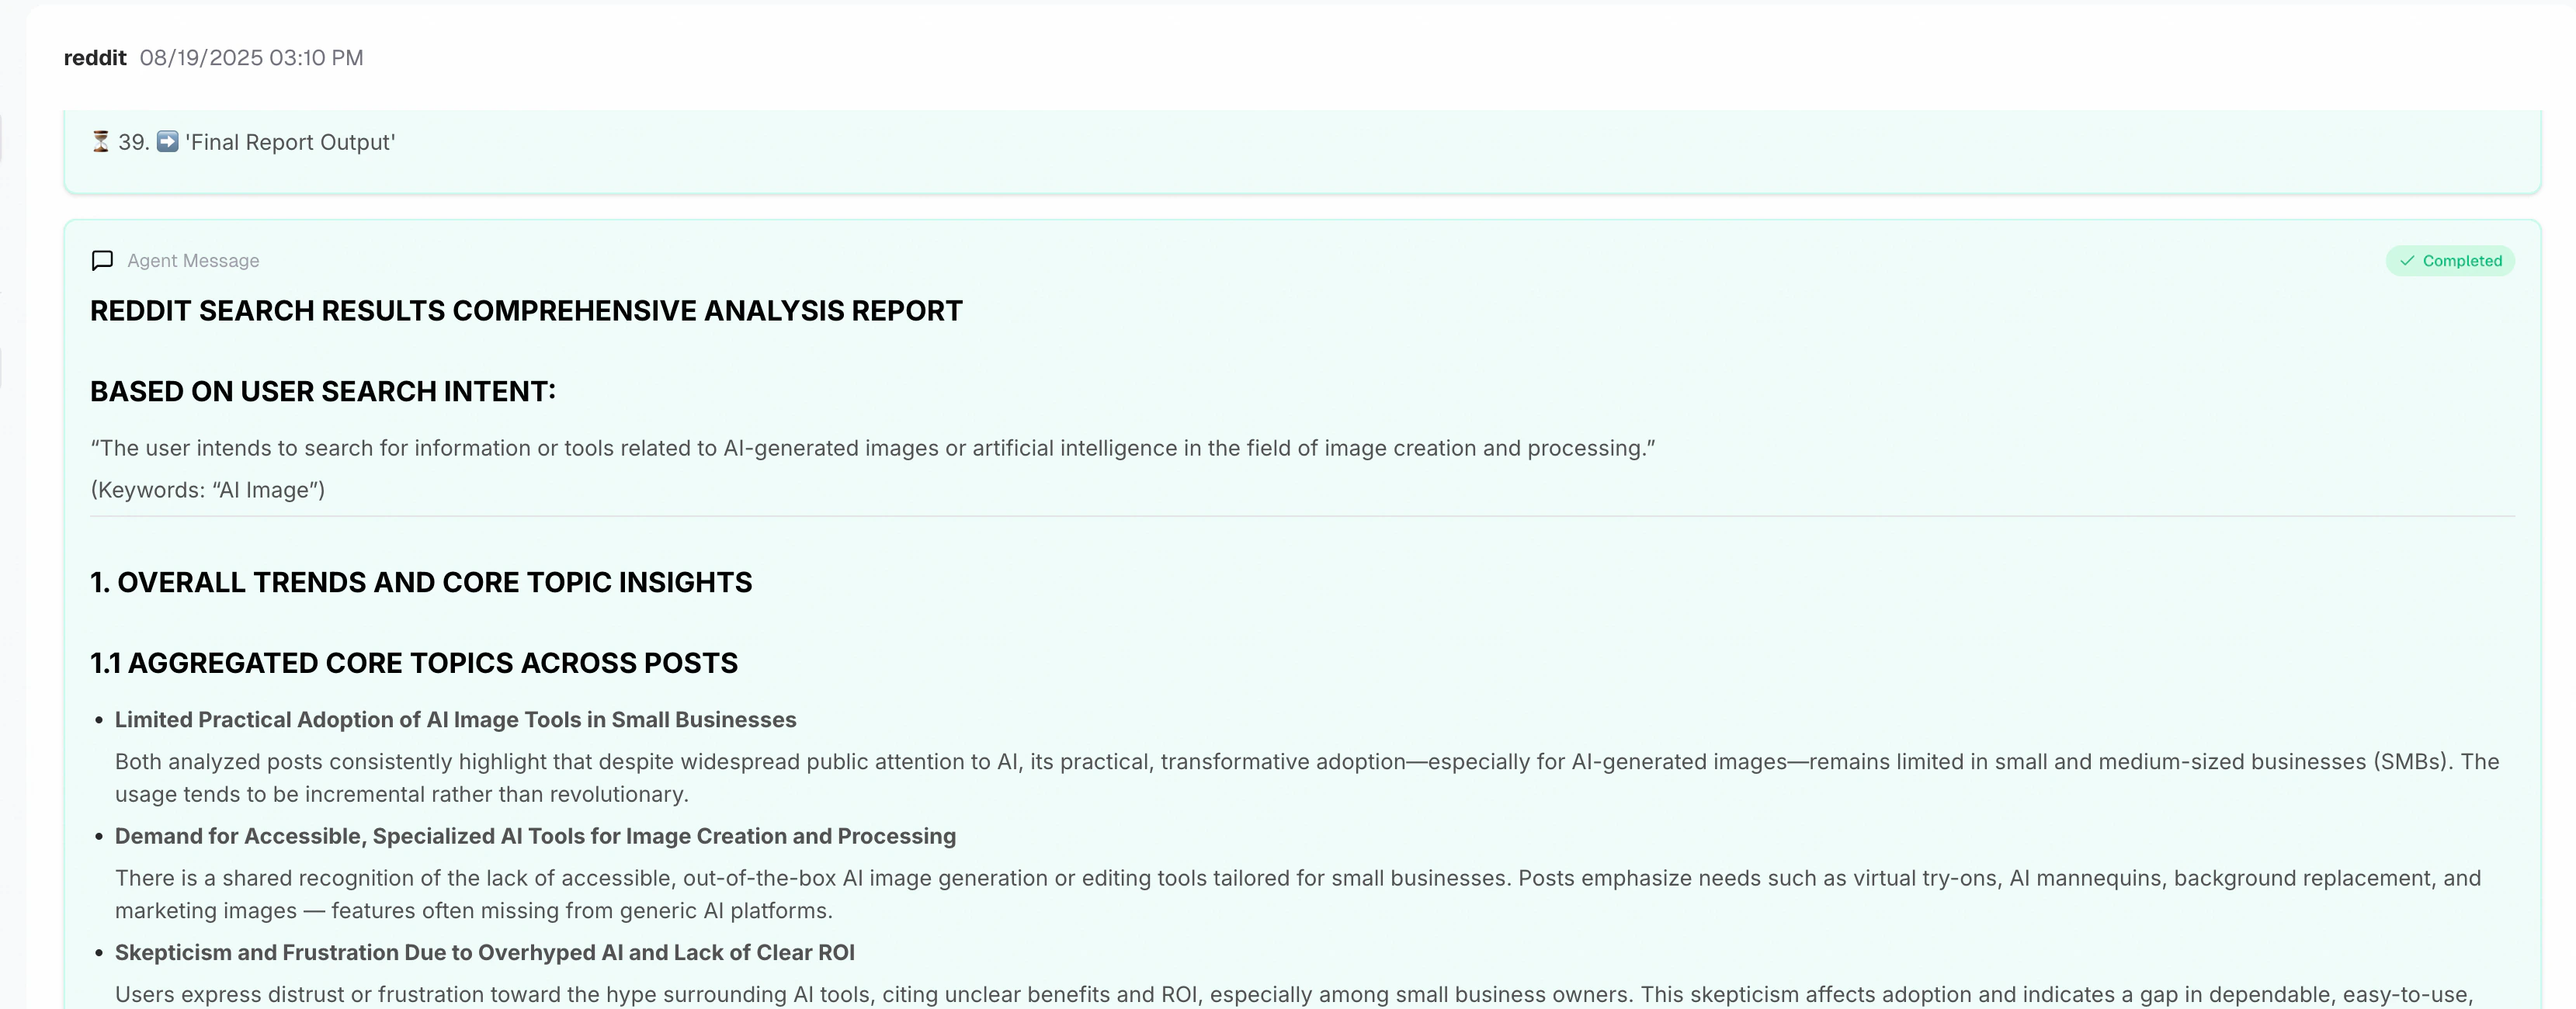
- The effect is shown in the figure:
Images
-
Also output using Markdown. The JSON field is
markdown_content, and the content is:\ - The effect is as follows:

Videos
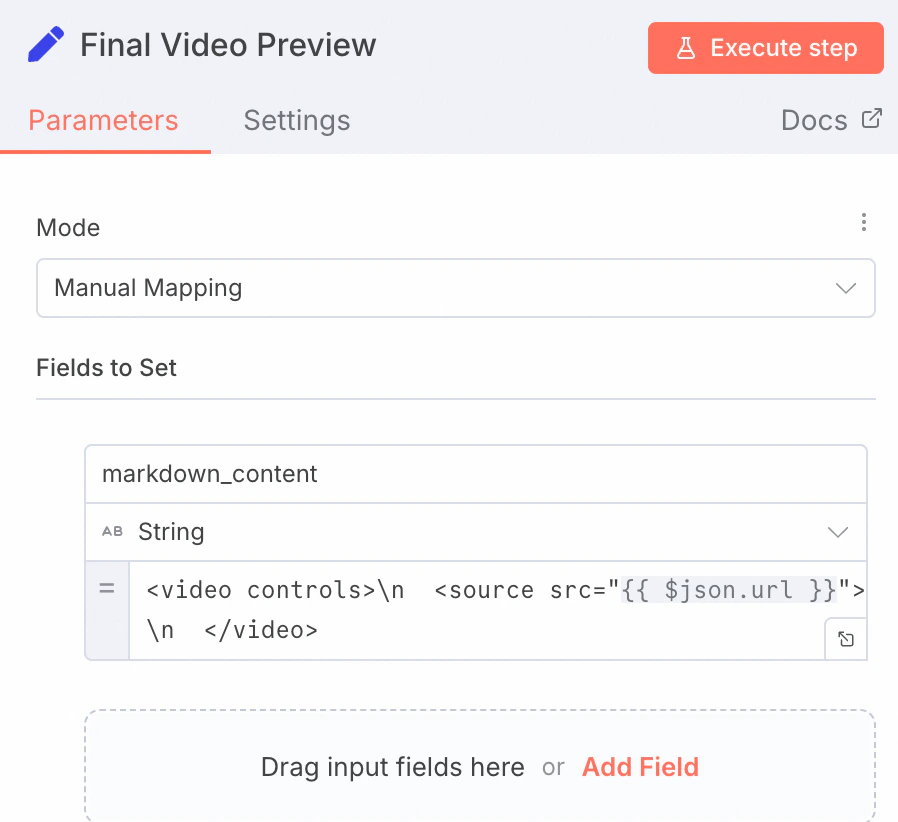
- Similar to images, also in Markdown format. The JSON field is
markdown_content, and the content is:<video controls>\n <source src="{{ $json.url }}">\n</video>
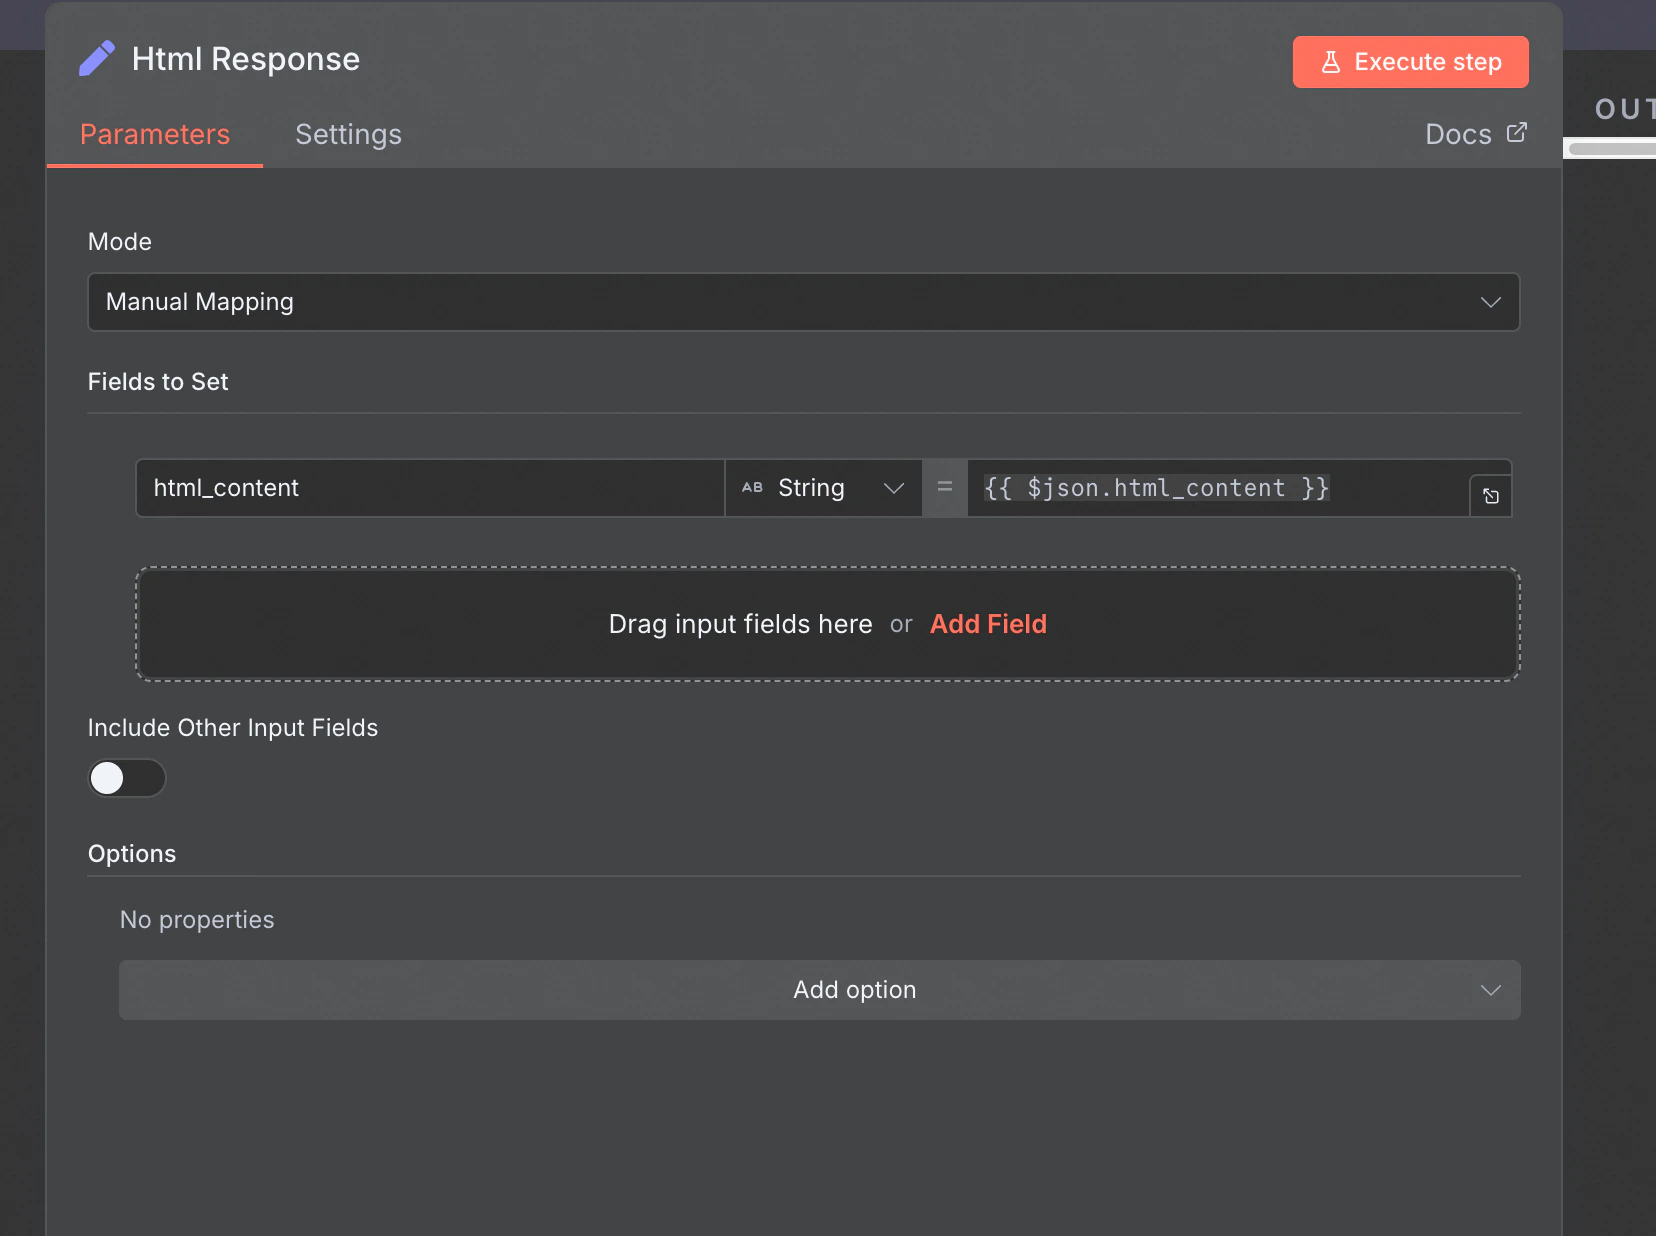
2. HTML Rendering
- The supported output format is HTML file rendering. The JSON field is
html_content, as shown in the figure below:
- The effect is shown in the figure:
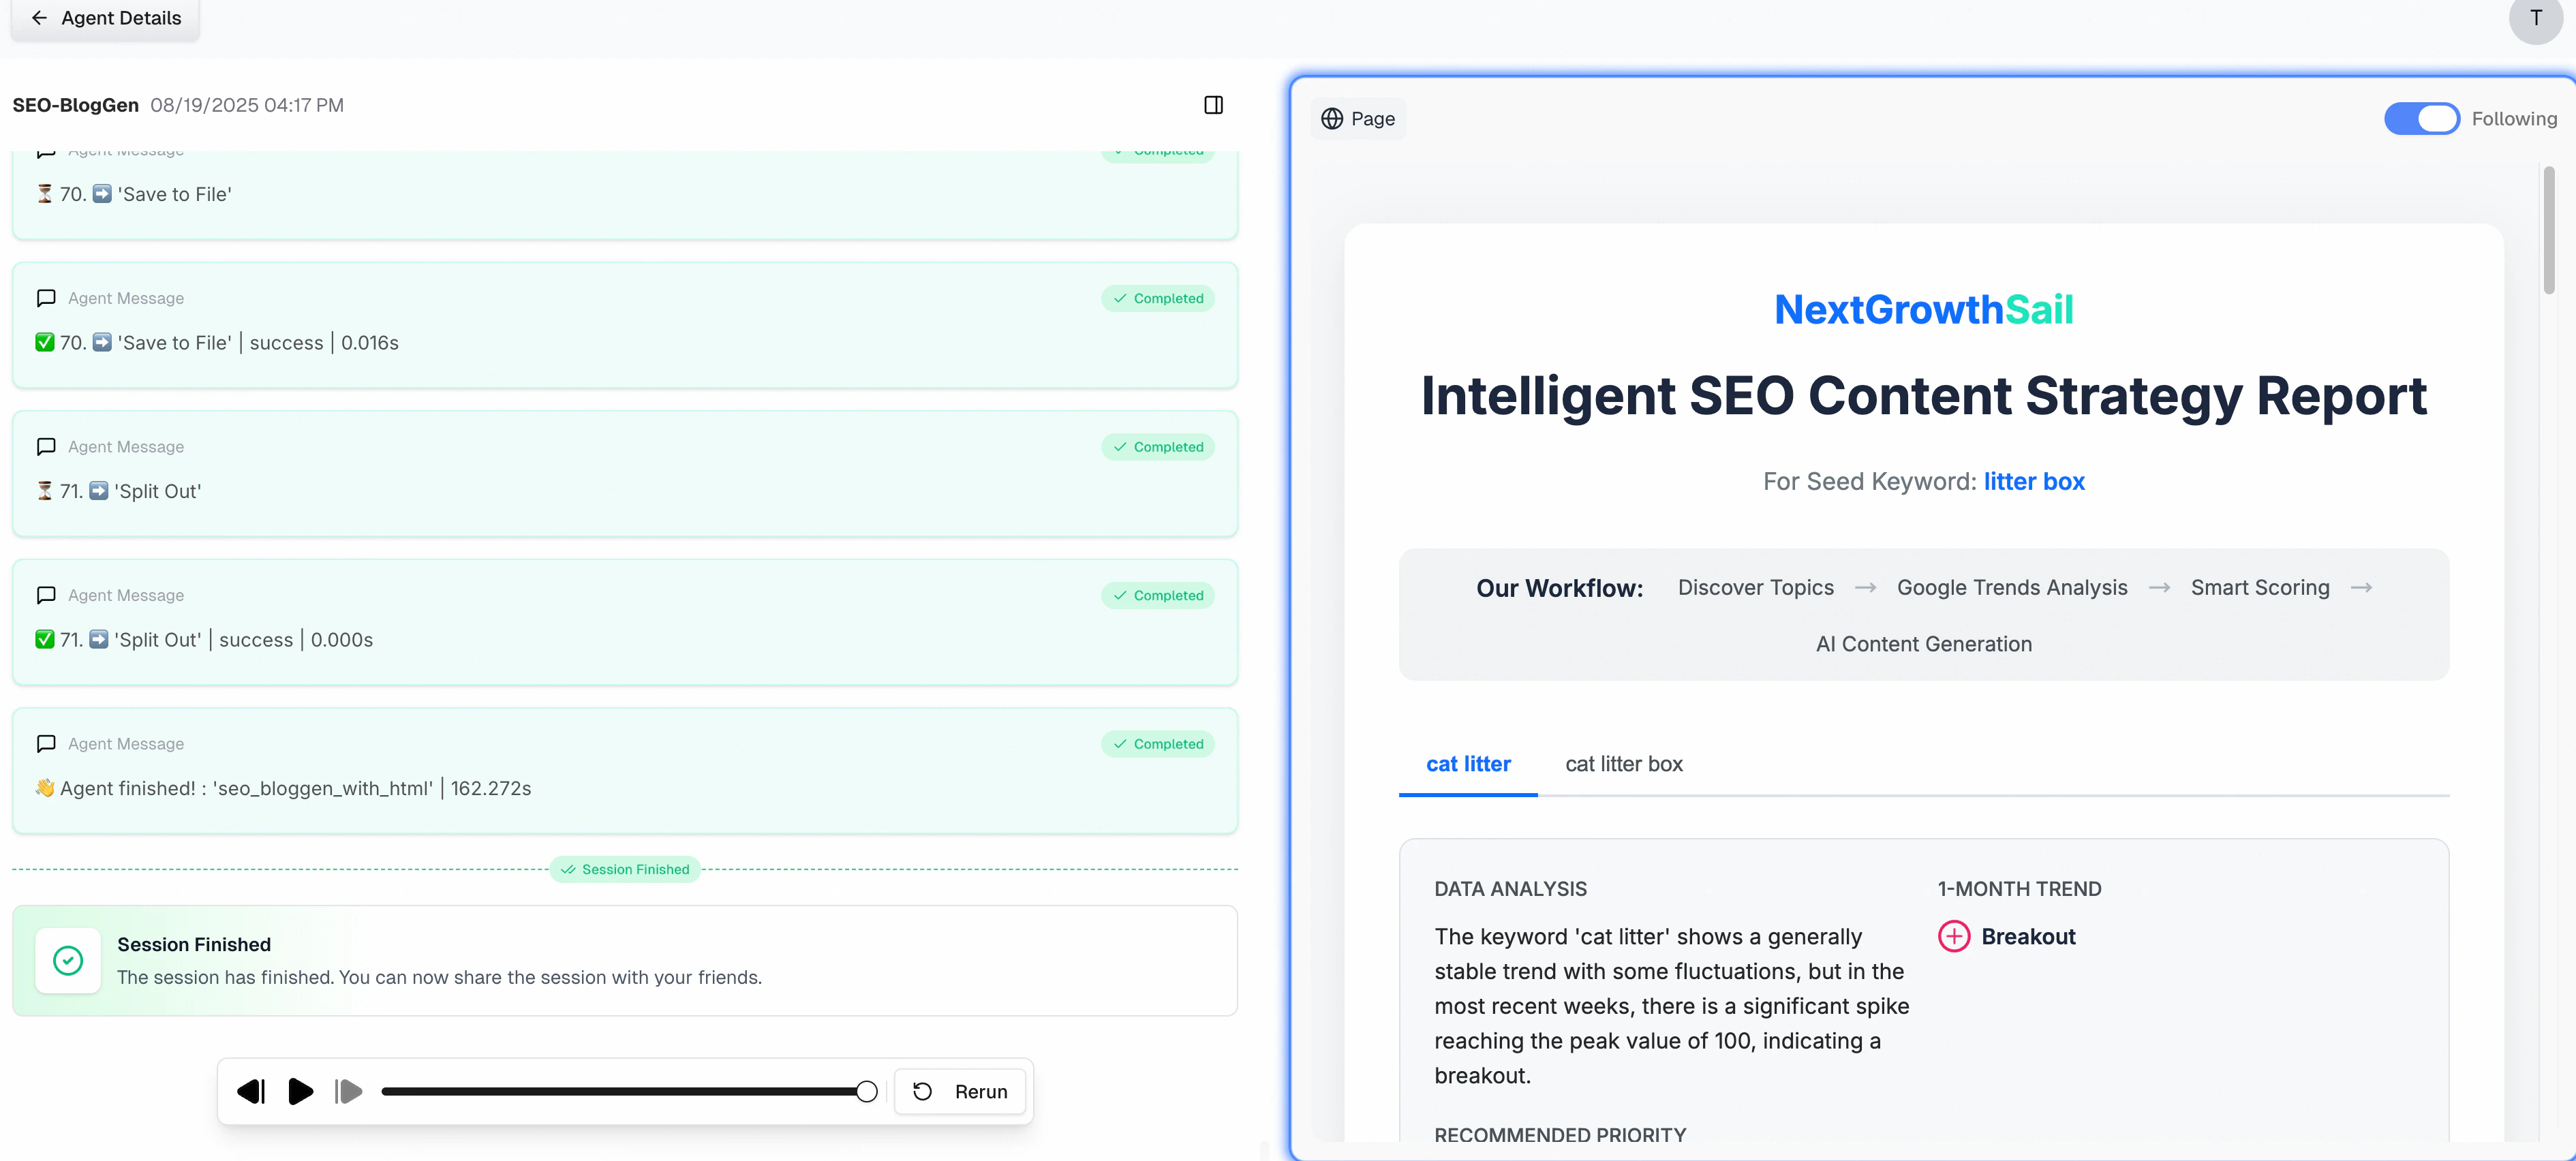
- HTML rendering on MuleRun no longer requires creators to provide additional information, such as domain/subdomain or SSL certificates. MuleRun will now automatically host a unique subdomain for each HTML render.
3. Files
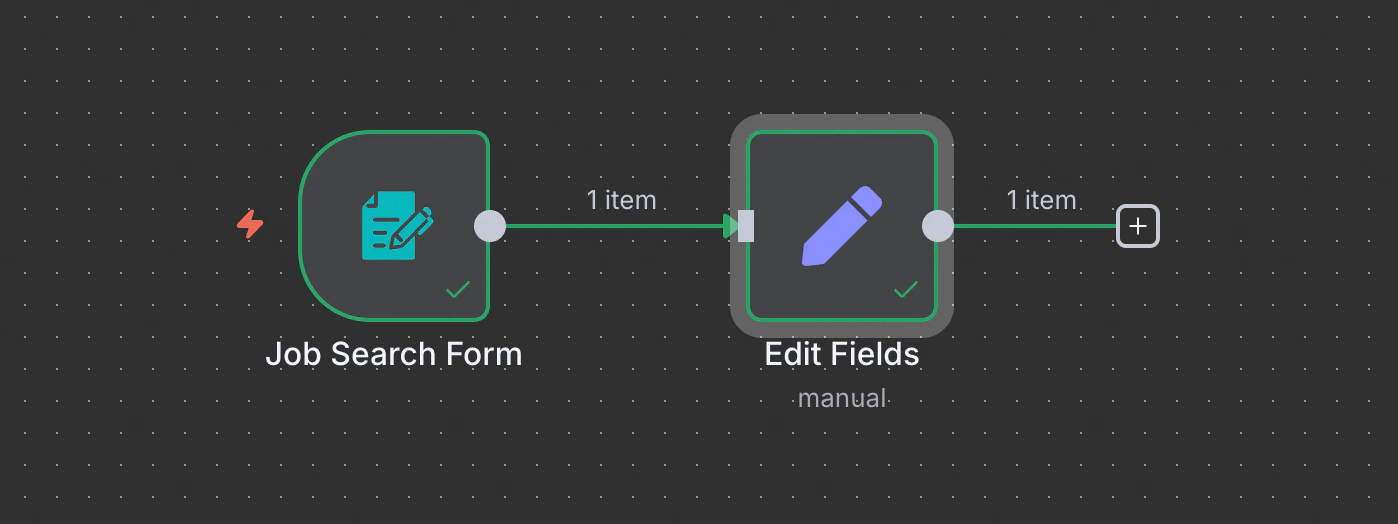
-
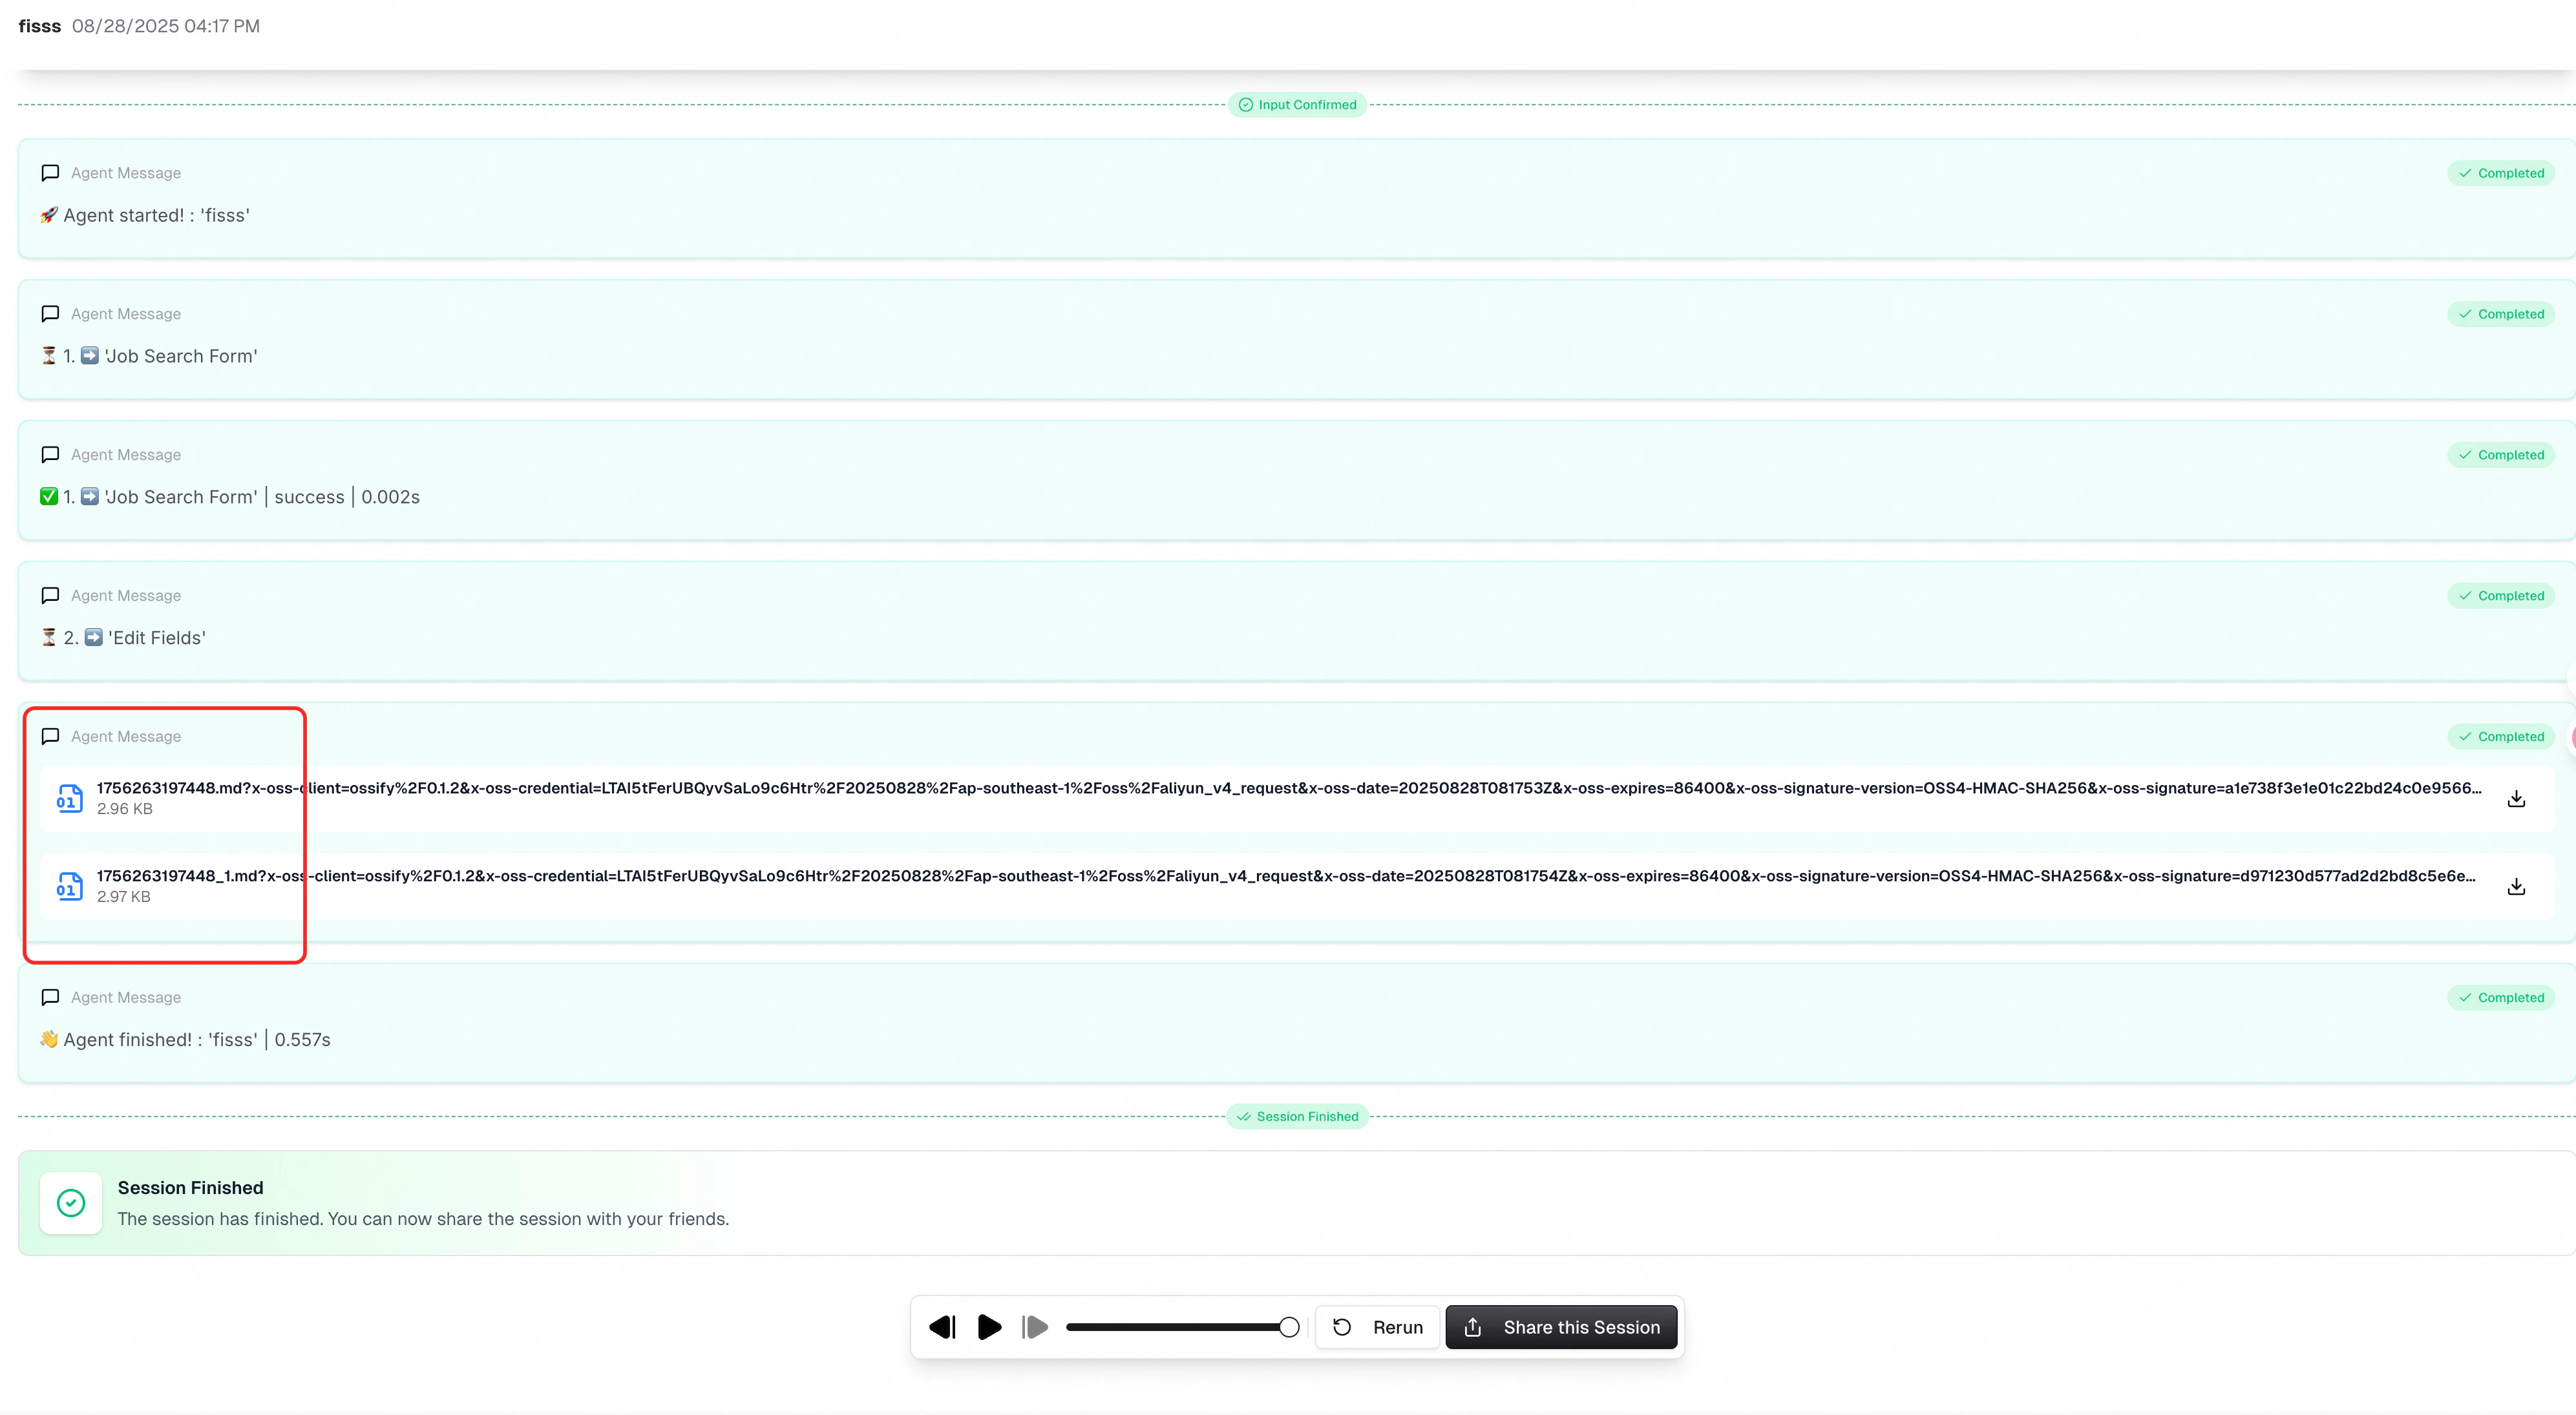
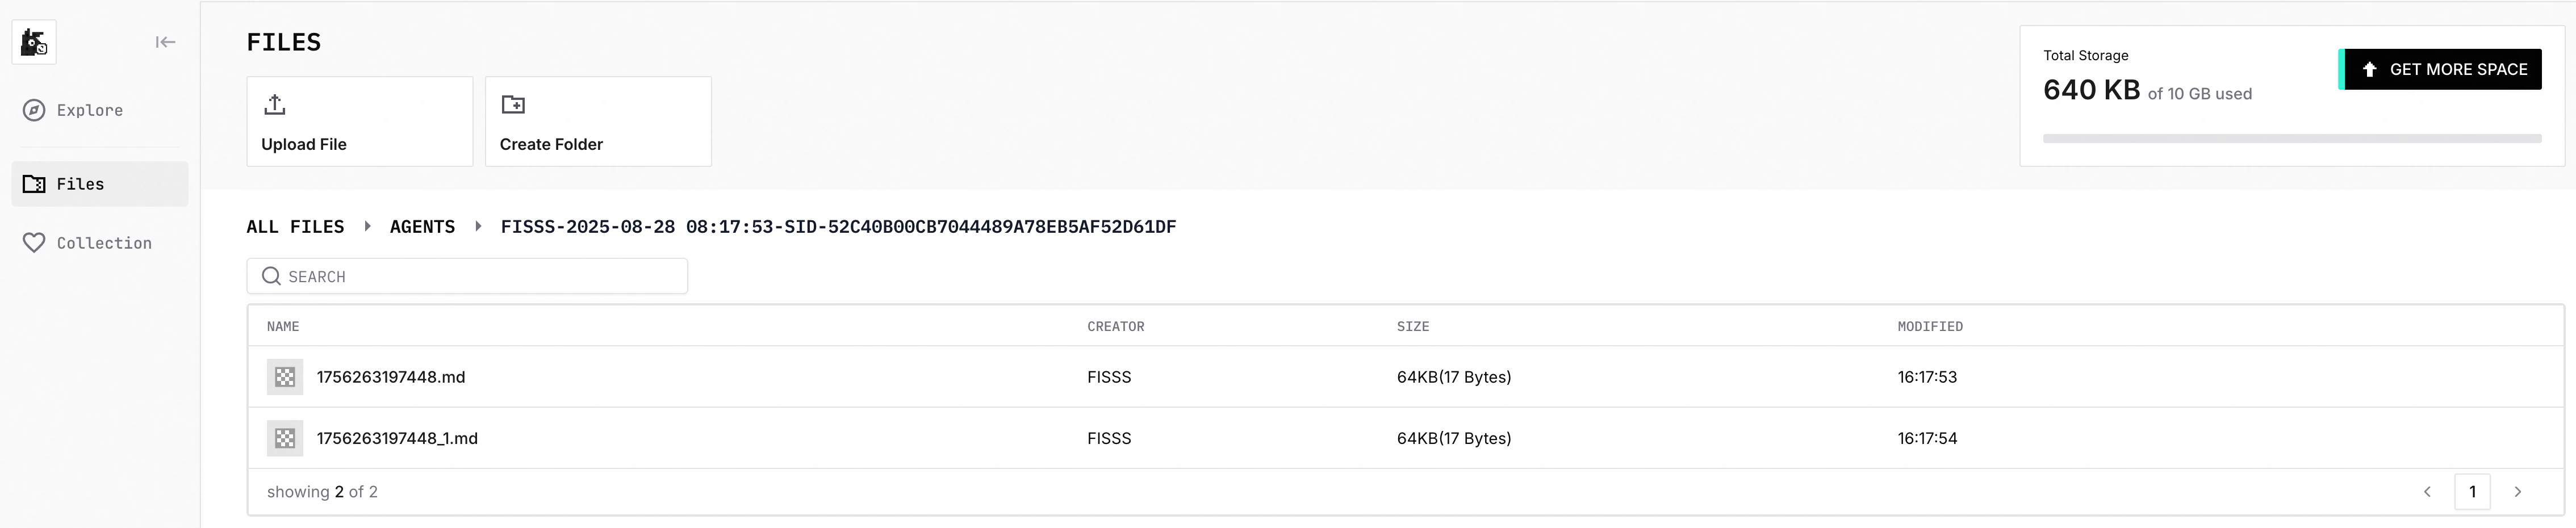
Any binary file data from the final node of the workflow (i.e., nodes not connected to any other nodes) will be uploaded to
mulerun.com/workspace/filesat the location:agents/{agent-name}-{time}-sid-{session-id}/{filename}- Node type: Unlimited
- Node output field name: Unlimited
- Binary file type: Unlimited
- Filenames can be duplicated. If more than one file has the same name, a number will be appended to the end of the filename.
- Filename length must not exceed 200 characters. Special characters are allowed.
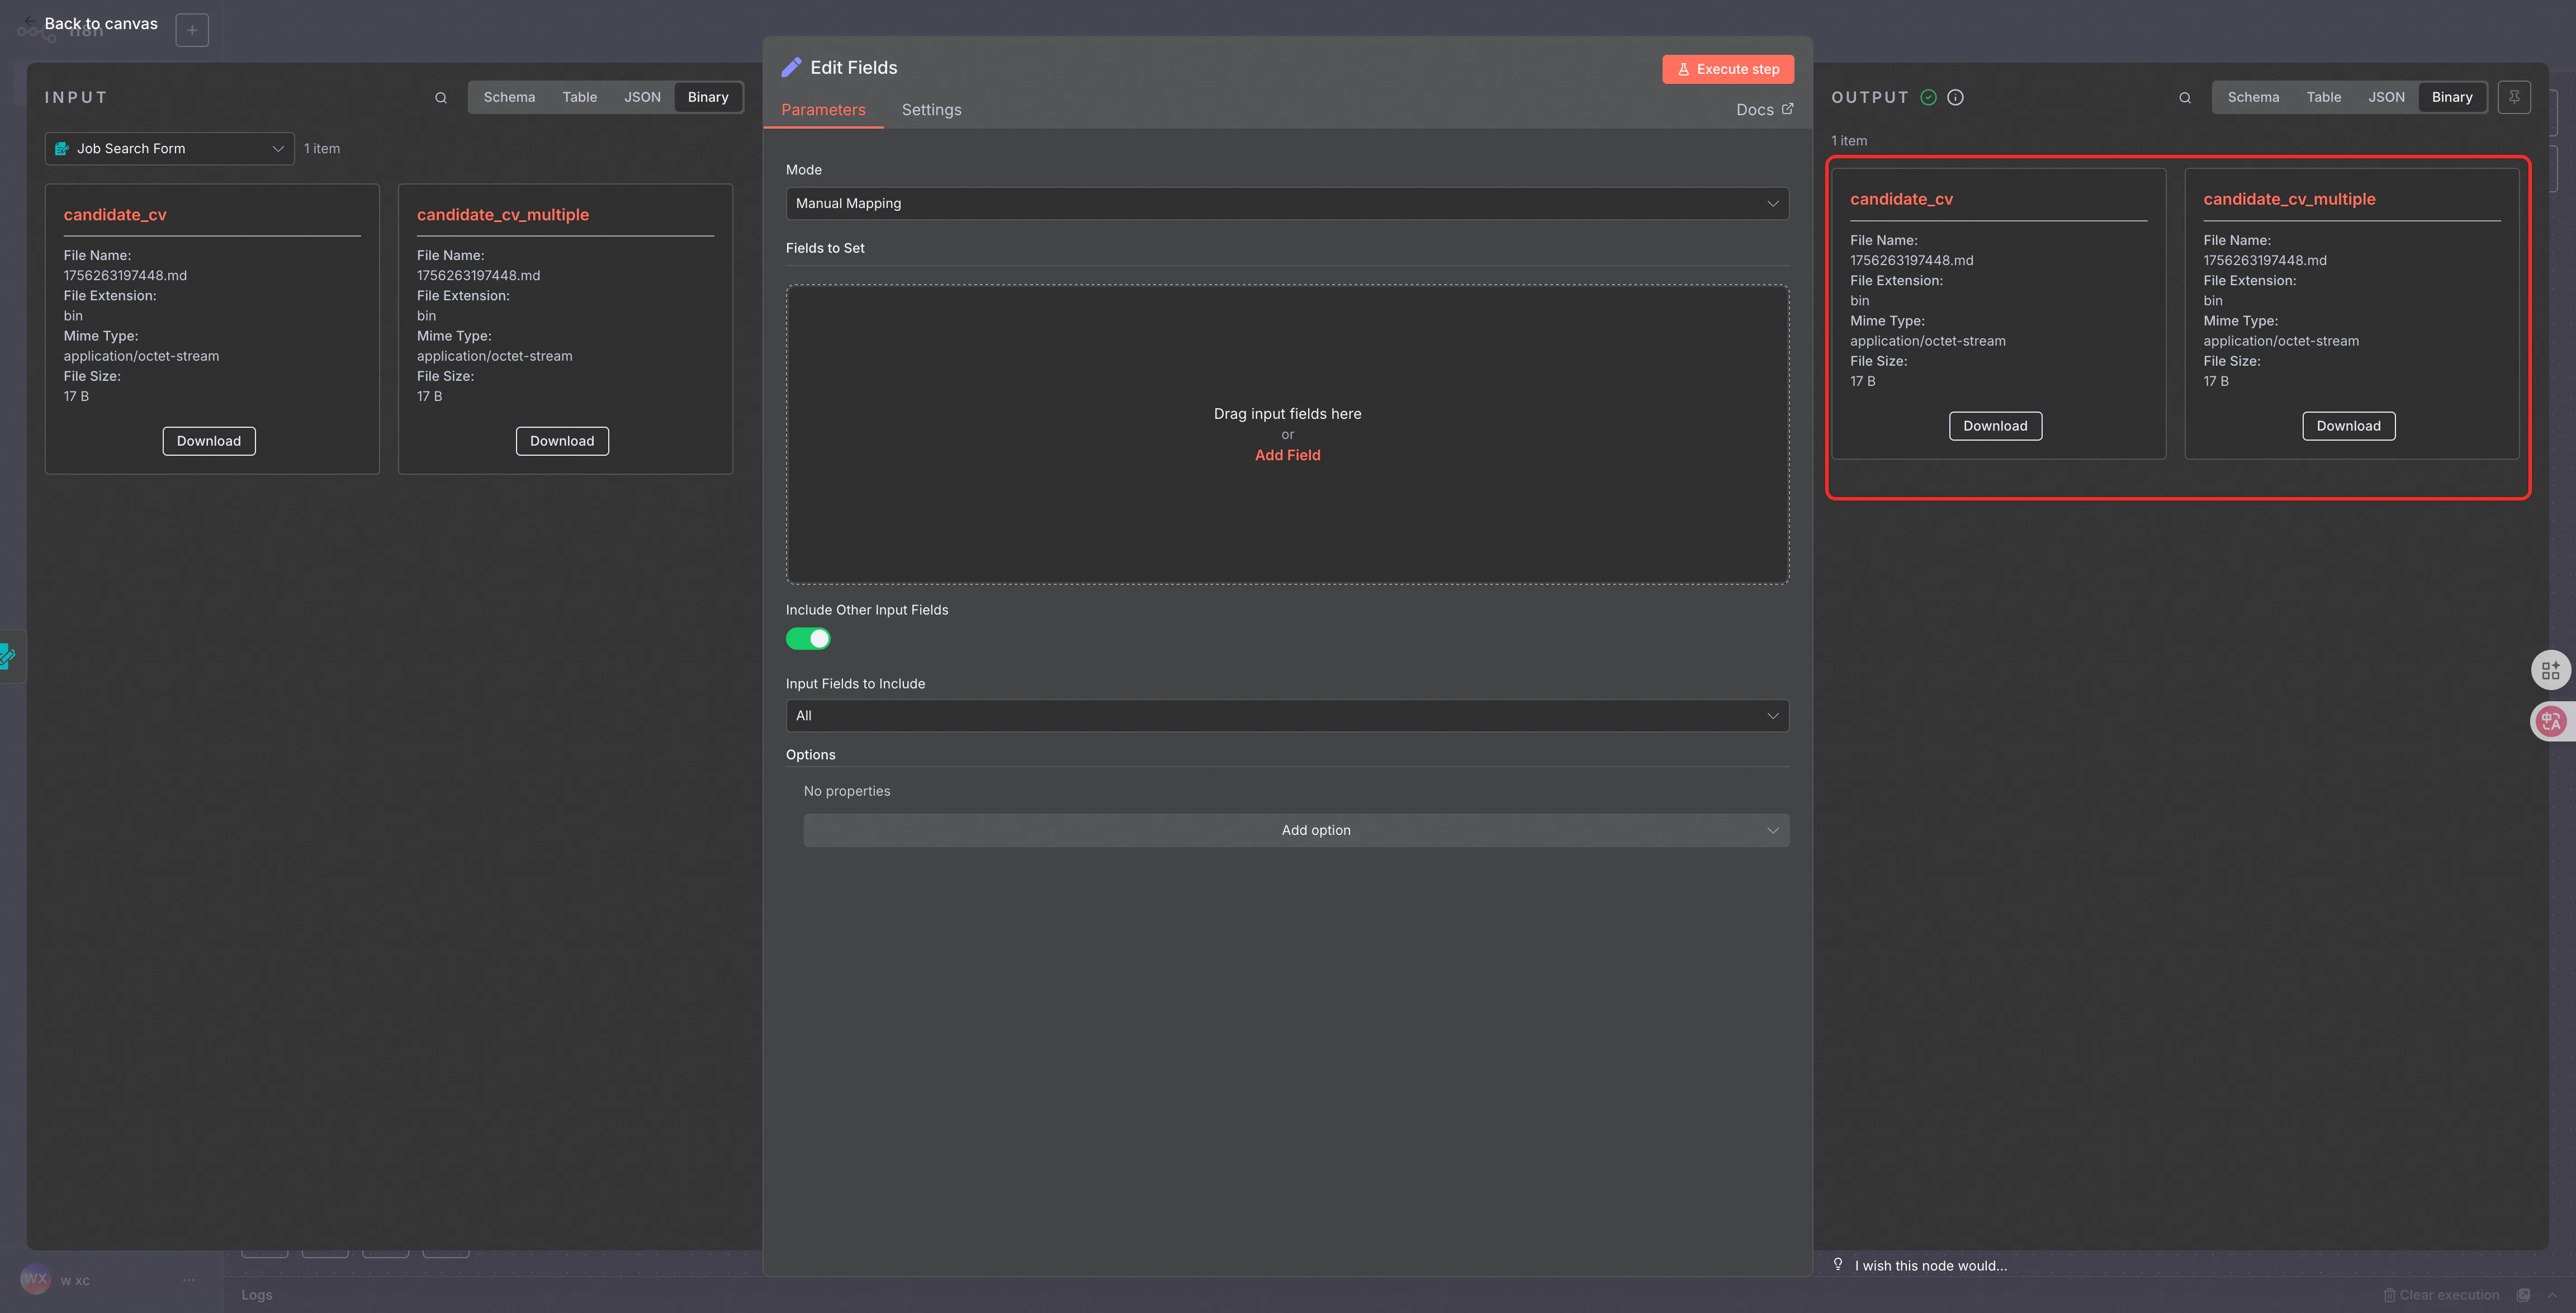
- Some n8n nodes cannot pass binary data from the input to the node output. In such cases, use a Merge Node to pass binary data across nodes and synchronously wait for data aggregation.
- All items in the red box will be uploaded:
4. Navigation URLs
- Set
navigation_urlstohttps://mulerun.comwill show like this:
Appendix 2: Example of Non-Standard Credential Configuration
Incorrect Approach: Hardcoded Key
- Example: PiAPI
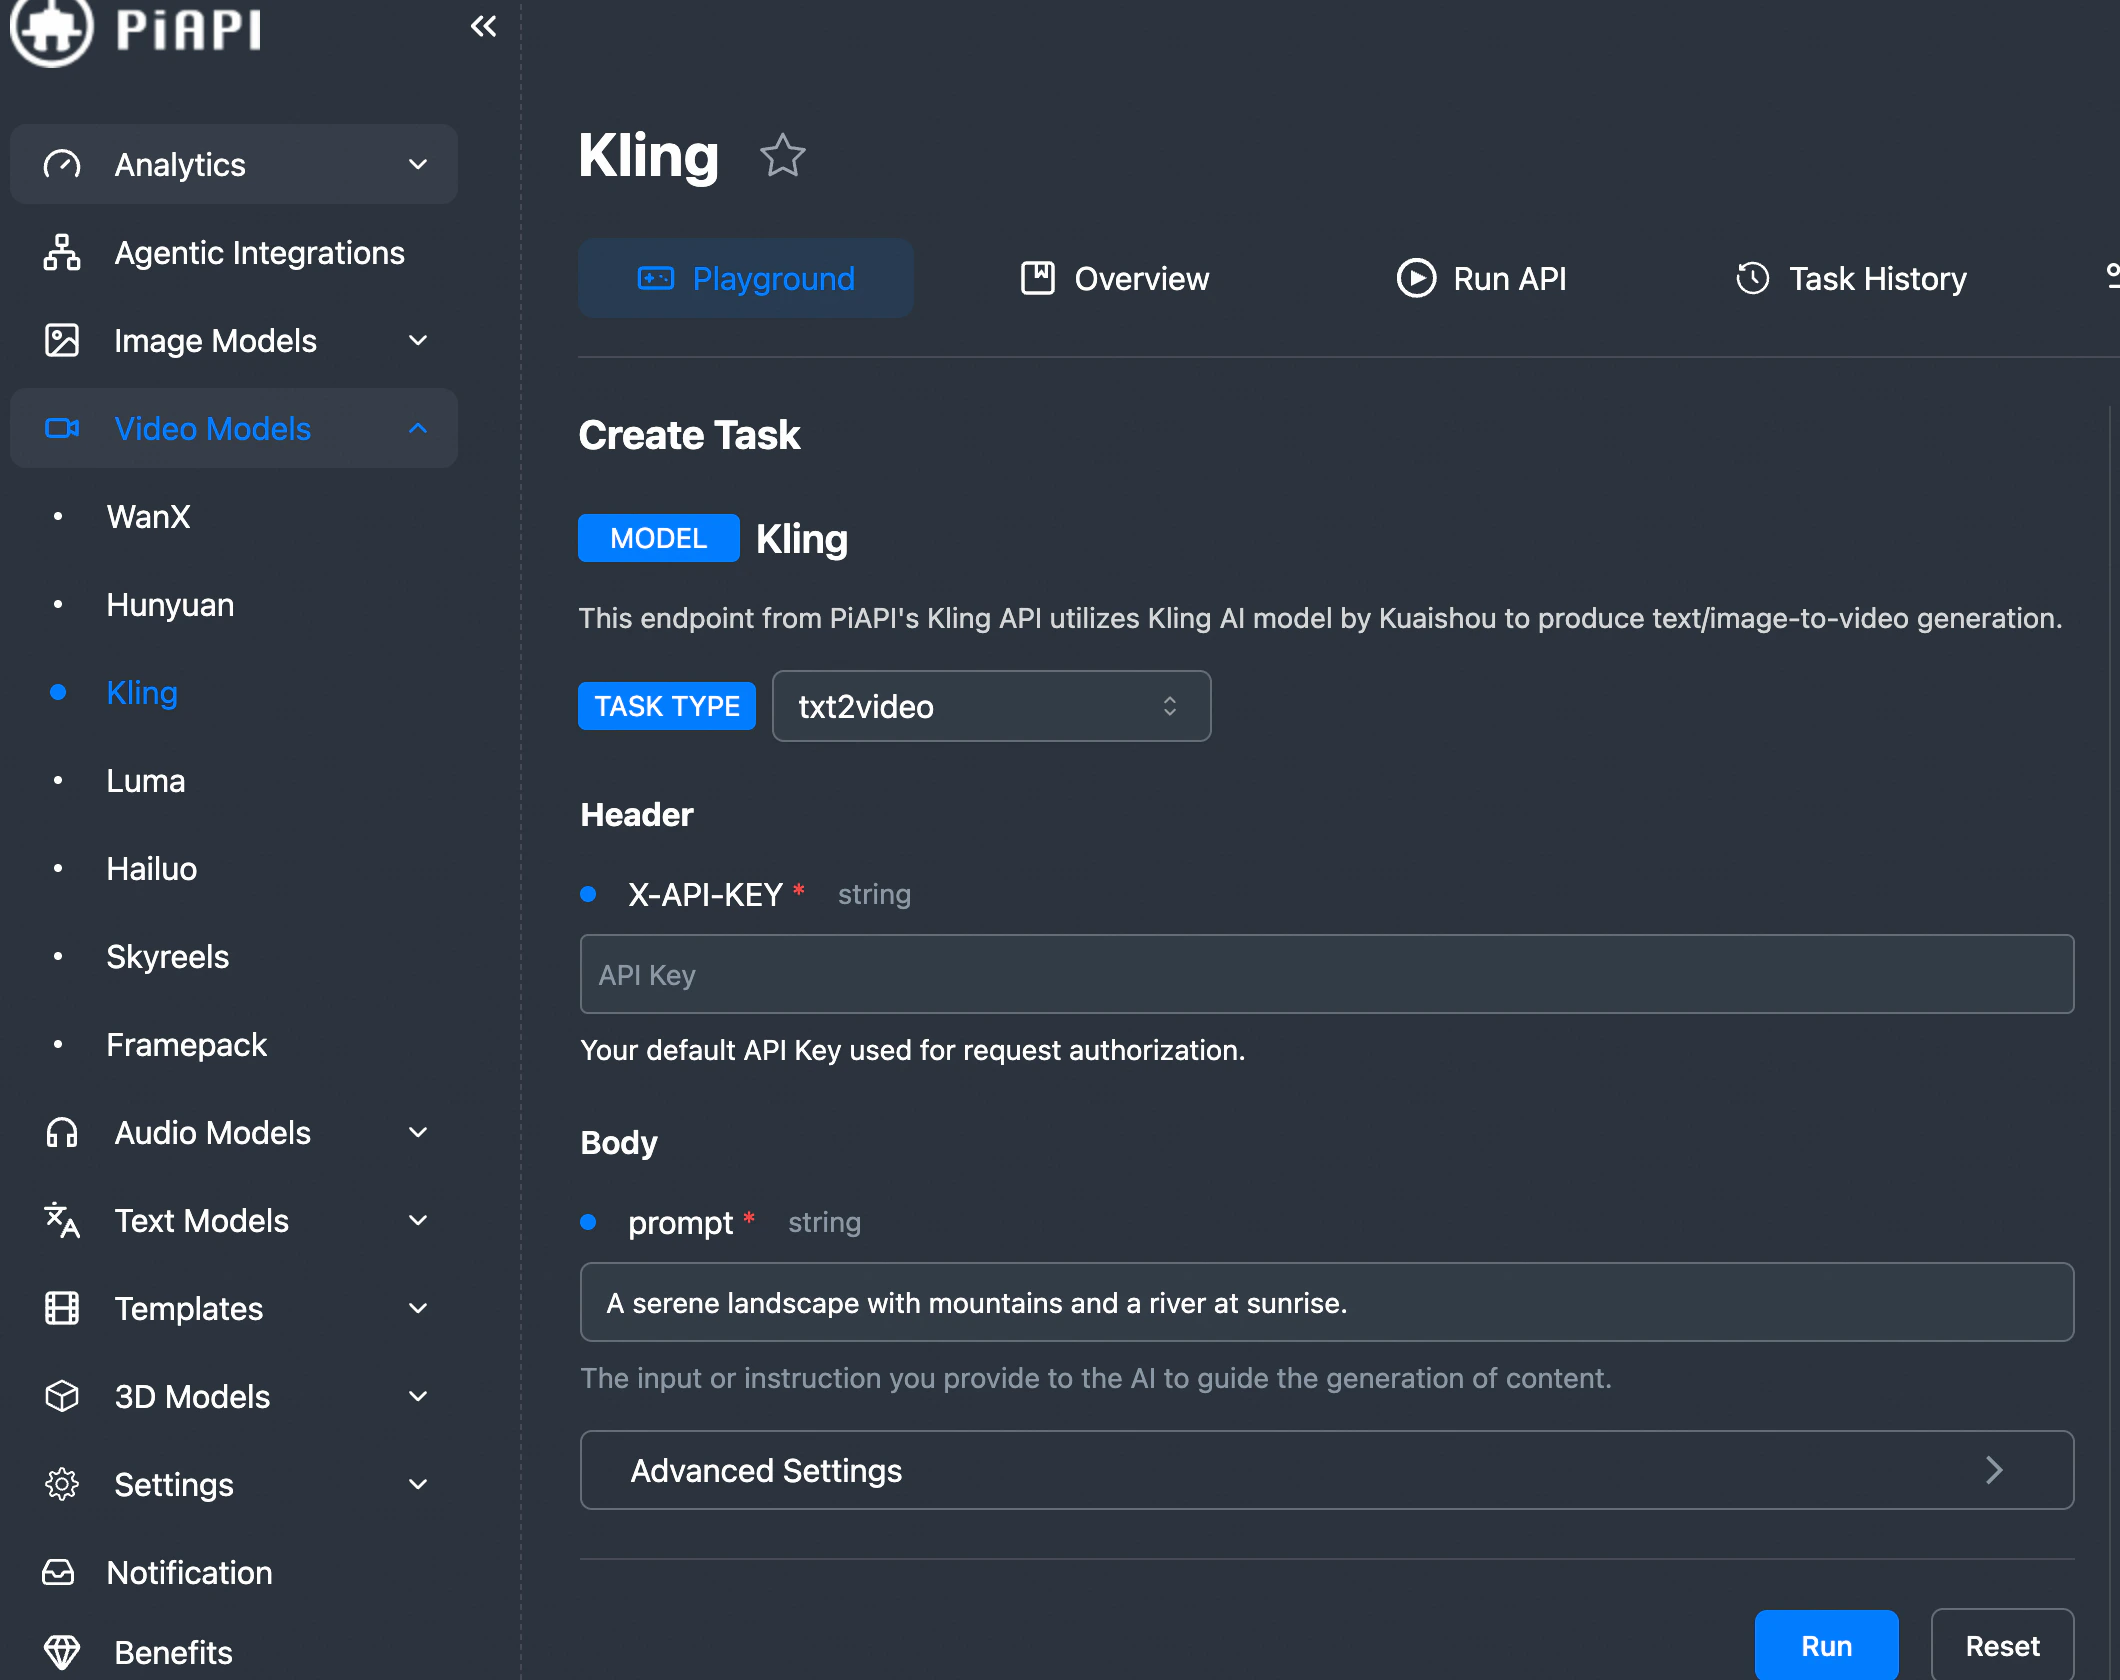
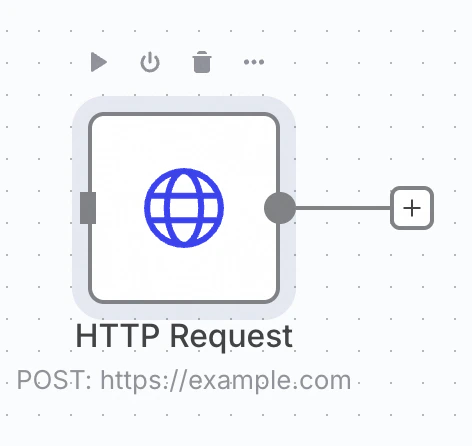
- Requires including
X-API-KEY: {YOUR-API-KEY}in the HTTP Header. Many Creators create an n8n HTTP Request node as follows:
- And configure it as follows in the “Send Headers” section, filling in
X-API-KEY: {YOUR-API-KEY}in the header:
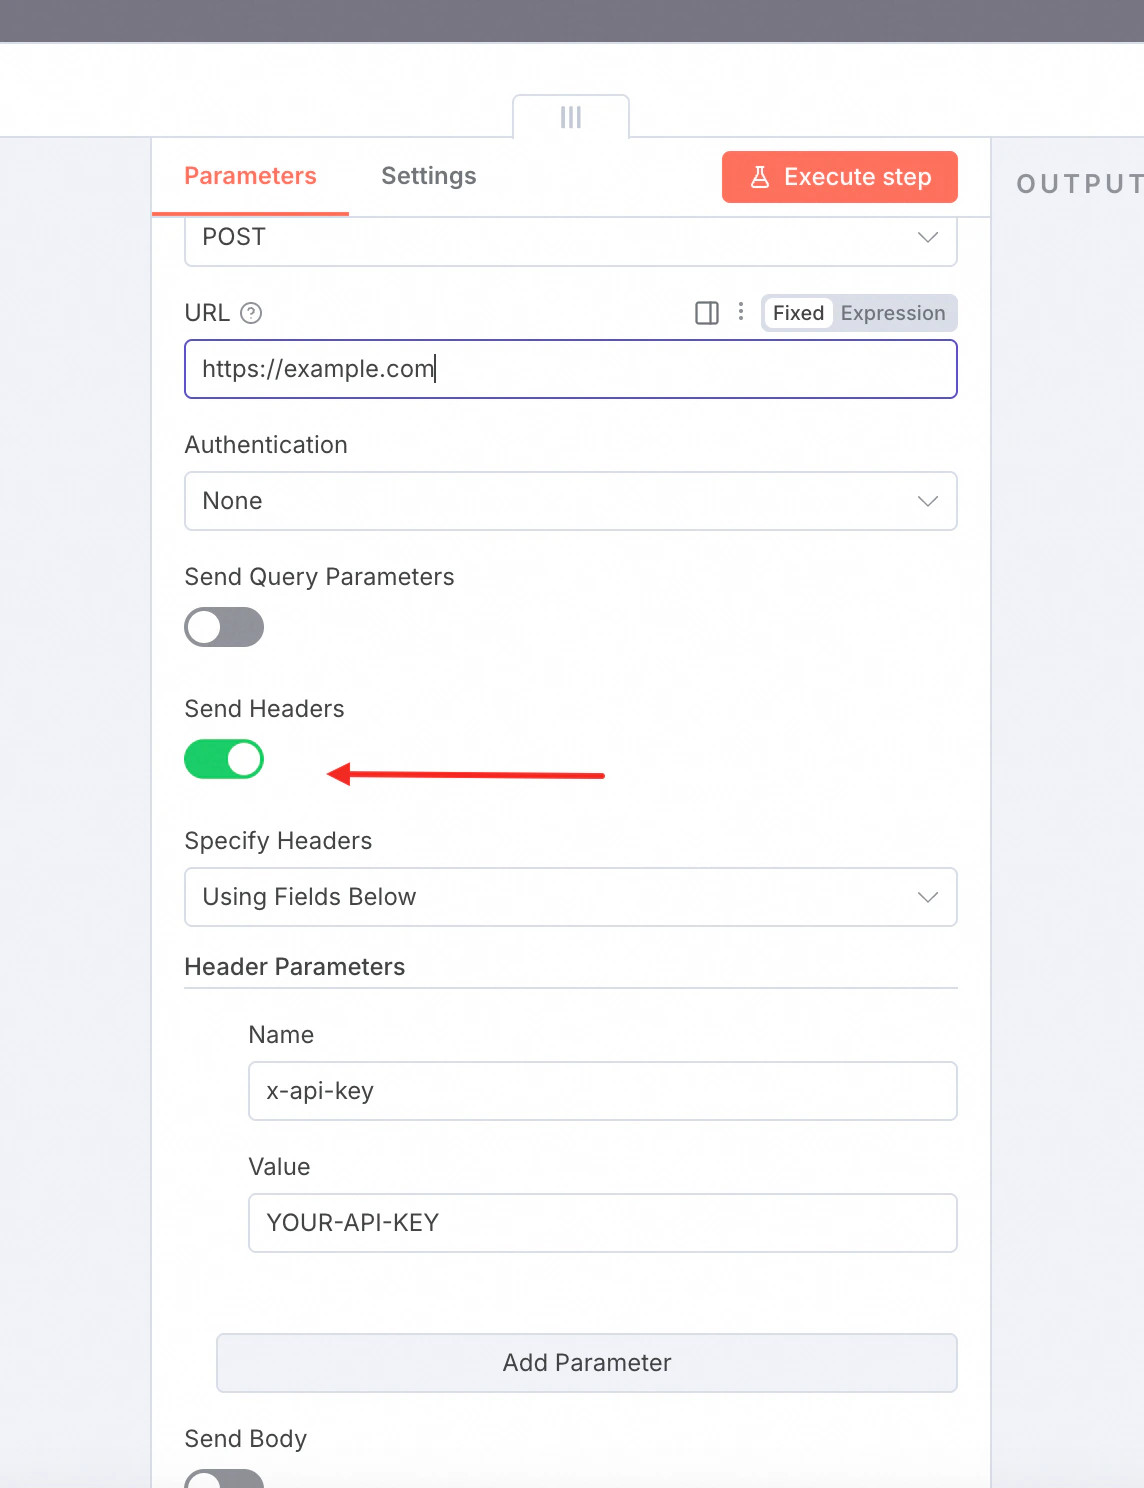
- Note: This is the wrong approach ❌. It makes it difficult for the Mule platform to detect that the Creator is using this credential, thereby complicating maintenance.
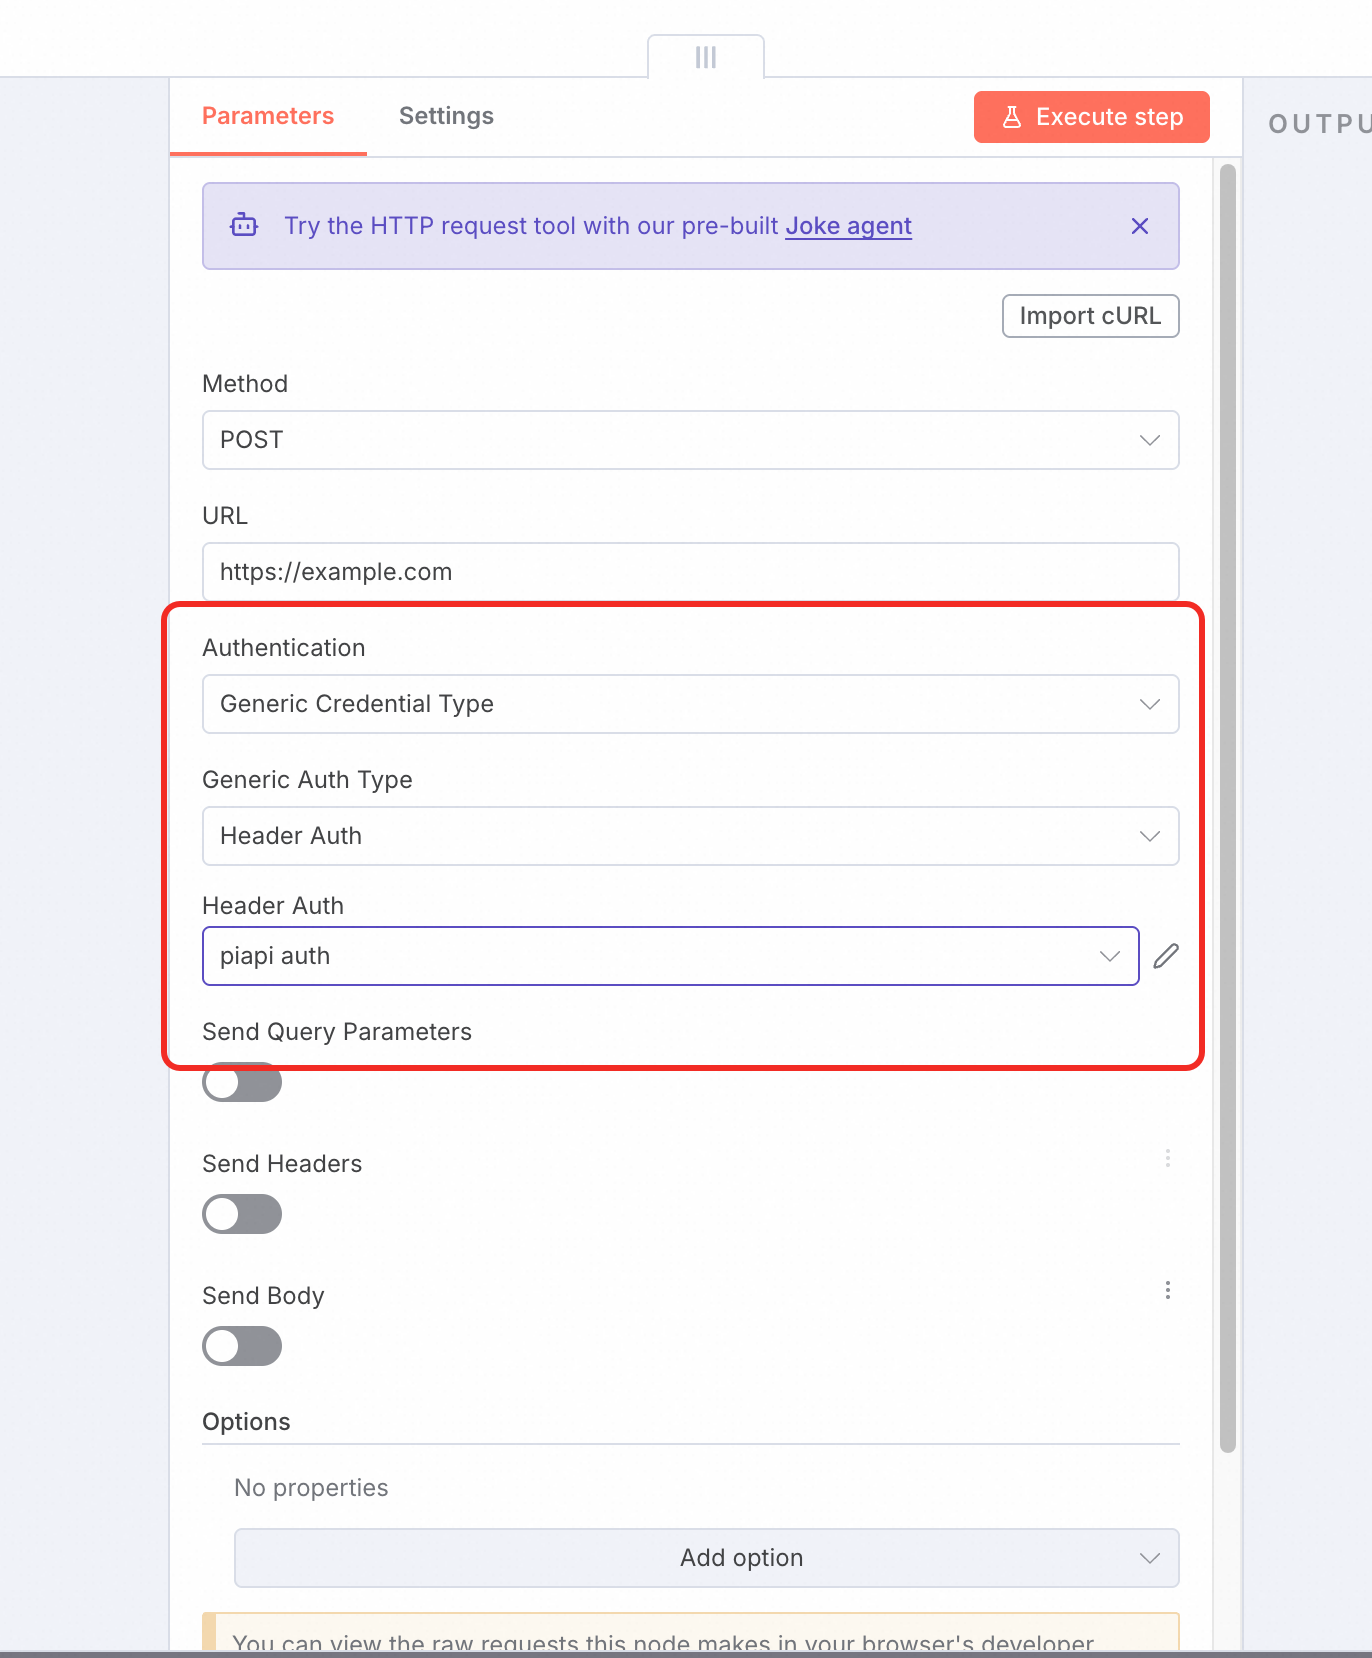
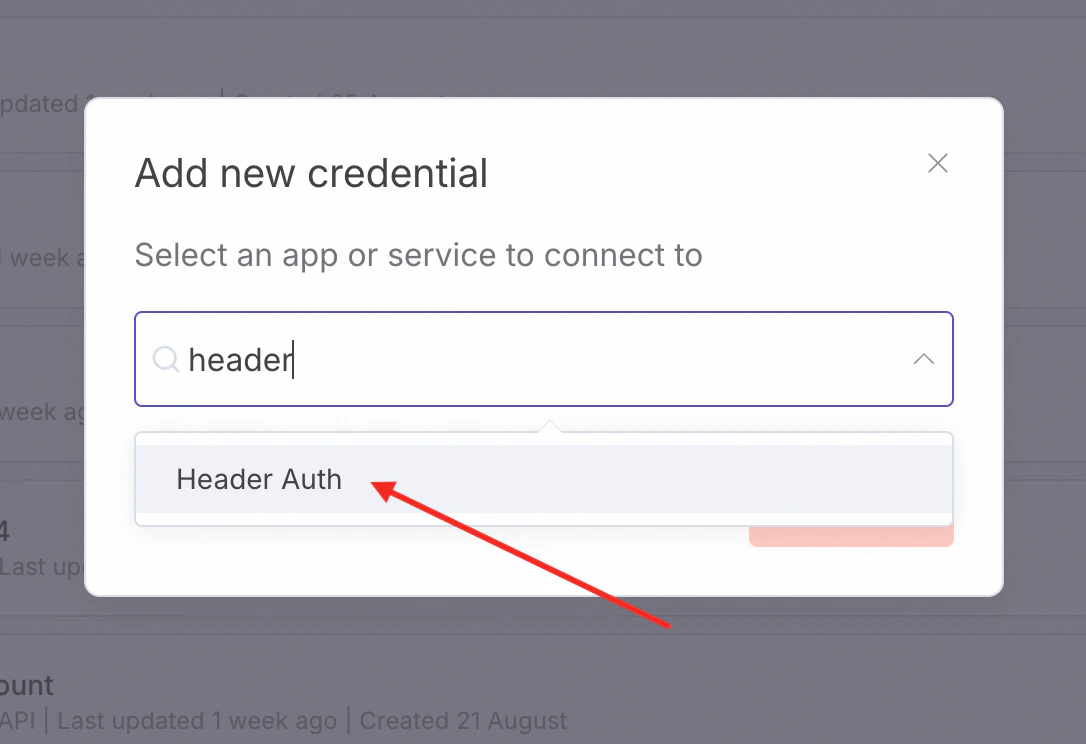
Correct Approach: Using Credentials
- Create a Header Auth - type Credential in the credentials section, as shown in the figure:
- Enter the Key - Value pair for the Auth. Name it
piapi auth.
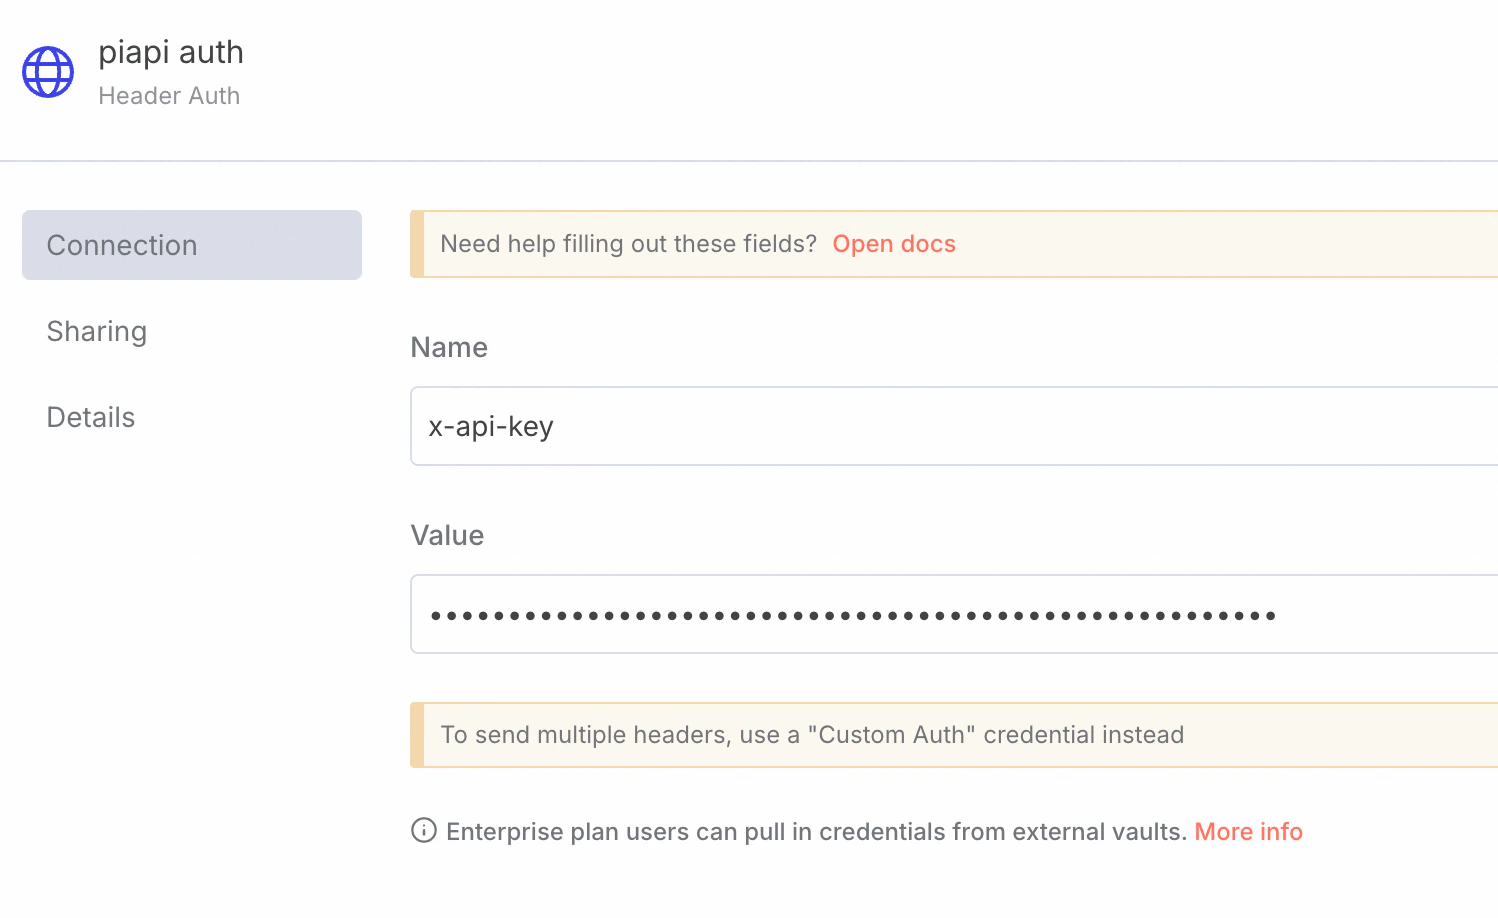
- In the HTTP Request node, select Authentication > Generic Credential Type, then choose the Header Auth type and select the newly configured
piapi auth.